Columnar strip foundation for a residential building. Installation and installation of pile foundation
The most common type of foundation in individual construction is a monolithic strip foundation.
However, the use of traditional technology is sometimes impossible due to unfavorable geological conditions.
So, on the site of the proposed construction, the following phenomena may occur:
- the upper layers of the soil have a high coefficient of frost heaving;
- the construction region is characterized by a large depth of soil freezing;
- due to the high compressibility, the upper layers of the soil have an extremely low bearing capacity, while the solid soil lies deep enough;
- the construction site has a significant slope (hillside or river bank).
In all these cases, the strip foundation would have to be laid quite deep, which would noticeably affect its cost and labor costs.
Of course, if the project of the house involves the presence of a basement or underground garage, the foundation will have to be made deep one way or another, but if nothing of the kind is planned, the cost of building a deeply buried strip foundation may seem unjustified.
The optimal solution in such a situation can be considered the device of a columnar - strip foundation. We will try to figure out what this type of foundation is and what is the technology of its construction.
A columnar - strip foundation is often called a combined one, since it is a kind of hybrid of a columnar foundation and a conventional strip foundation. The idea is to support not the entire foundation, but only a few pillars, against a strong and stable ground.
To transfer the load from the walls of the house to the pillars, a reinforced concrete monolithic screed is constructed above them, through which the entire base turns into a single structure.
The screed is also called a grillage, but in its structure it is the same strip foundation, only it rests not on the underlying soil, but on the pillars.
If a columnar - strip foundation with a monolithic screed is erected on heaving soil, its sole should be located above the ground surface, so that there is a gap under the grillage tapes. With slightly heaving soil, the tape screed can be deepened by 40 - 50 cm.
Those who have already managed to thoroughly study the topic of building a foundation for a private house will surely recognize in the columnar-strip foundation a type of pile-strip, erected on drilled-stuffed piles.
Indeed, both options are essentially the same thing. But a monolithic reinforced concrete drilled column is not the only option, although it is the most popular. Supports for a columnar - strip foundation can also be made of brick or concrete blocks.

Of course, it is not worth building a columnar - strip foundation for a brick house or any other with heavy walls. But the construction of light building materials - wood, aerated concrete or foam blocks - the "hanging" grillage tapes will withstand quite well.
What do we gain by using this technology:
- The volume of work and building materials is reduced, and hence the cost of construction.
- The speed of foundation construction is increasing.
- This method does not require the involvement of highly qualified specialists and heavy equipment, so any private trader is able to make a columnar - strip foundation with his own hands.
Construction instructions
The work on the construction of a combined strip-column foundation is preceded by the usual preparatory stage, during which the construction site is cleared of debris and plantings, leveled and marked with pegs and a cord.
The next course of action is as follows:
1. Well preparation
 The vertical supports of the foundation under construction should be placed in the corners of the building, as well as under all load-bearing walls with an interval of 1.5 - 2 m. Strictly speaking, the distance between the pillars, as well as the design of the grillage (concrete brand, cross-sectional dimensions, reinforcement scheme), follows choose on the basis of a calculation that takes into account the weight of the building structures, the physical properties of the soil and many other factors.
It is best to entrust the calculation of the columnar - strip foundation to a qualified civil engineer by contacting a specialized company for this.
If it is decided to make the grillage buried, then before drilling wells, it is necessary to dig a trench for it. Usually its depth is 40 - 50 cm, and the width of the trench is 7 - 10 cm wider than the grillage. For a strip base raised above the ground, instead of a trench, a sand embankment is made, which is removed after concreting.
The scheme of the strip column foundation assumes the presence of a broadening at the bottom of the pillars.
This constructive element allows:
- increase the area of support of the foundation on the ground without increasing the diameter of the columnar support;
- prevent extrusion of the support by frost heaving forces acting tangentially on its side surface.

The most convenient way to produce a well with broadening is associated with the use of the so-called TISE drill. The tool weighs a little more than 7 kg, so drilling with it can be done manually. It differs from a conventional drill in the presence of a folding knife, through which an enlarged hemispherical cavity is formed at the final stage of the well device.
At the beginning of drilling, the folding knife is removed, forming a conventional cylindrical well with a diameter of 25 cm. In this case, the drill is rotated clockwise. In the course of work, the drill is periodically removed, removing the next portion of the soil.
When the well goes to a sufficient depth (the cutting tip of the tool should be immersed in solid soil by 15–20 cm), the drill is again raised to the surface and a folding knife is fixed on it.
When drilling is resumed, it will sink under its own weight, as a result of which a broadening in the form of a hemisphere with a diameter of 60 cm will appear in the lower part of the well. Only the drill must be rotated counterclockwise this time.
In the absence of such a tool, the sole of the column can be created in another way, which we will discuss below.
At the bottom of the well, made according to the TISE method, it is not necessary to arrange a sand cushion. If the soil under it is not strong enough, it can be strengthened with cement milk. In conventional wells, a 20 cm high backfill is made from well-moistened and compacted coarse-grained sand.
2. Formwork installation
 For the manufacture of columnar supports, you can use:
A) rigid formwork - asbestos-cement or polymer pipes;
B) flexible - tubes sewn by means of a fishing line or adhesive tape made of roofing felt, roofing felt or PVC film.
The formwork of the tape part of the foundation is constructed from wooden boards with a thickness of 15 mm or more.
The boards should be wrapped with plastic wrap, so that they will not deteriorate and, after dismantling the formwork, can be used for other purposes.
3. Manufacture of the reinforcing cage
 To reinforce columnar supports in wells, a reinforcing cage is installed from 4 reinforcement rods with a diameter of 10–14 mm, connected by annealed wire with a diameter of 6 mm. The frame has the form of a long narrow parallelepiped with a square base, while the reinforcing bars are its ribs. The dimensions of the frame must be such that there is a gap of 50 mm between the reinforcement and the formwork.
In the formwork of the grillage, according to the rules of reinforcement, a reinforcing cage is also arranged, consisting of two belts - upper and lower. The reinforcement of the tape part and columnar supports must be connected to each other.
4. Pouring concrete
 The structure is concreted with a mixture of grade M200 and higher. In the absence of a TISE drill, you must first pour a layer of concrete into the wells to a height of 20 - 30 cm, and then raise the formwork pipe. Spreading concrete forms a sole of increased diameter. Then the entire foundation is filled with the mixture, starting with the wells and trying to pour all the concrete in one go. The mixture is pierced with a rod to release air, and then compacted until laitance appears.
After the concrete has hardened, the formwork is dismantled, and the surface of the grillage is pasted over with waterproofing.
Video about the construction of a column-strip foundation
The columnar strip foundation is one of the bases suitable for the construction of frame houses, panel, panel, log cabins. In cases where work on the construction of a building is carried out on sandy soil, which is characterized by a low level of groundwater (more than one meter), it is possible to build brick buildings on this basis. The ability to make a columnar strip foundation with your own hands allows you to refuse to hire a construction team and rent heavy equipment.
Depth calculation
The start of work is connected with the choice of the most suitable material for the given area, which will be used in the construction of the supporting pillars, and the depth of the foundation. To do this, geological survey work is carried out, during which it is established what particular features the soil has in a given area.
After the conclusion of geologists is received, you can begin to perform calculations and draw up a project. This is best entrusted to an experienced designer, even if all other work will be done by hand.
 The quality of the soil directly affects the depth of the foundation.
 The calculation of the depth of the future columnar strip foundation is carried out based on the following indicators:
- soil quality;
- the depth of its freezing;
- groundwater level.
If the level of groundwater is significantly below the freezing point, then the heaving of the soil does not threaten the foundation, but in order to avoid the destruction of the structure when water is close, the supporting structure must be located below the freezing level.
The calculation is carried out in accordance with existing building codes. This means that the minimum foundation depth is 10 centimeters, and the maximum depends on the above indicators. As for the calculation of the upcoming load, attention is paid to both the weight of the walls and the quality of the materials used for the construction of the roof.
So, for example, the calculation of the roof is carried out taking into account the weight:
- lumber;
- roofing material;
- loads taken on by a roof of a certain size;
- the total weight of the structure.
The calculation of the total weight of the future building box includes weight data:
- bricks or blocks used, made of gas or foam concrete, necessary for the construction of walls;
- materials used for the construction of partitions inside the building;
- floor slabs;
- solution;
- communication systems;
- furniture designs.
 This base combines the advantages of tape and column bases.
 The calculation of the total load of the structure includes data on the weight of the strip base itself, which exerts a certain pressure on the supporting pillars.
The column-strip foundation is created, depending on the surveys and calculations, both in the form of a reinforced concrete prefabricated grillage structure, and in the form of a monolithic tape.
Given the need for a basement floor, it is worth calculating its weight and the upcoming load. After carrying out all these calculations, it is possible to say with certainty what load the building will exert on the ground, and to calculate the width of the supporting part of the tape base.
Preparation and start of work
Having received all the necessary data, you can begin to clear the territory and prepare the site for construction. In the selected place, the fertile and clay layer of the earth is removed from the soil, replacing the clay with a layer of sand if necessary. Its thickness should not be less than 20 centimeters. In order to build a columnar-strip foundation with your own hands, you will need to accurately and correctly mark the site.
When marking, strictly monitor the observance of the right angle at the intersection of the lines of the future base. It is at the intersection points that the supporting pillars are built and installed, and non-compliance with an angle of 90 0 leads to skew, deformation and destruction of the entire structure.
 The recessed base is the most reliable and is mounted below ground level.
 Before proceeding with the construction of supports, it will be necessary to determine the type of columnar base, depending on the depth of its laying. He can be:
- buried, that is, located below the established freezing point;
- shallow - installed 70 centimeters below the soil level;
- not buried. This design does not have an underground part.
The height of the supporting pillars is influenced by the construction technology and which particular design of the grillage is chosen for this structure.
Building a base from pillars with a grillage with your own hands involves the use of the most affordable materials. This means that in most cases, builders dig pits and pour reinforced concrete pillars as supports, performing high-quality reinforcement.
A distinctive feature of such a base is the presence of a sole under each pillar. If the dimensions of the pillar itself are at least 40x40 centimeters, then for a reliable sole it is necessary to prepare a platform of at least 1x1 meter. Such a sole does not require reinforcement, unlike supporting pillars. You will have to dig trenches with your own hands, without using construction equipment, keeping their width corresponding to the width of the sole.
In accordance with the technology for the construction of pillars use:
- reinforced concrete structure reinforced with rods with a diameter of 12-14 millimeters;
- asbestos pipe with internal reinforcement;
- brick;
- concrete blocks.
Wooden supports are practically not used. The technology is such that in the process of creating pillars it is necessary to perform high-quality reinforcement.
For this purpose, before pouring concrete in pipes or in pits, a reinforced frame is installed, based on the sole. Fasten the rods with a binding wire, avoiding the use of welding. This will protect the frame from corrosion.
pillars
 Poles can be either cast-in-situ supports or prefabricated jacket pipes.
 Pillars are the vertical supports of the column-strip foundation being constructed. They are located in the corners of the building, and if necessary (if the area of \u200b\u200bthe house is quite large), their number increases significantly.
You can make such supports with your own hands using ready-made pipes, building them from bricks or bay prepared pits with reinforced concrete frame. The column-strip foundation refers to the bases, for the strengthening of which expansion is required at the bottom of the supports.
In cases where the finished pipe will serve as a support, it is necessary to drill a well at the mark point to the depth indicated in the calculations. If a shallow columnar foundation is being constructed, then before drilling the wells, it will be necessary to dig a trench for the grillage.
When installing pipes, you should use a level to check their verticality. There should be no deviations, otherwise the support will not be reliable.
The technology for performing work does not require the creation of a pillow under such a support. During the pouring of concrete after the first portion, the pipe is lifted so that the solution flows out of it. The blurred part will play the role of a pillow.
If it is decided to make the pillars with your own hands, then first of all they build a pillow at the bottom of the pit. For such a widening at the bottom of the pit, they build a formwork of four fastened boards with their own hands, lay out waterproofing material and pour it with concrete. After the mixture has hardened, formwork is installed directly for the pillars. Boards with a thickness of at least 4-5 centimeters are installed vertically, fastened and sheathed with waterproofing.
A reinforced frame, assembled separately, is installed on the finished pillow in the middle of the assembled vertical formwork. It consists of vertical rods connected and reinforced with transverse jumpers. You need to take care of the presence of spacers that will help keep the frame strictly vertical. Then you can start pouring concrete. In such structures, concrete is not poured, but rather laid. This means that the mixture should not be liquid.
In its consistency, the solution prepared by oneself resembles rather thick sour cream. Filling is carried out gradually, laying layers of solution no more than 20 centimeters thick. Each layer is rammed with a vibrating tool or by bayoneting, getting rid of air.
To increase the strength of the structure, it is better to make the head of the column built directly into the grillage. Accordingly, the height of the column must be 10 centimeters higher than the design level, so that the grillage formwork is made in strict accordance with the project.
grillage formwork
When assembling the formwork for the grillage tape with your own hands, you need to take care of the availability of reliable supporting elements and high-quality fastening of the shields. Special attention should be paid to waterproofing. To do this, use impregnating compounds, roll materials, paint or a special coating mixture. The combined method is recognized as the most effective.
Inside the assembled formwork, a reinforced frame is installed, which, with the help of a knitting wire, is attached to the pillars sticking out of the surface of the hardened concrete. Reliable reinforcement allows several times to increase the spatial rigidity of the entire structure. After completion of work, proceed to pouring.
Watch the video on how to properly fill the foundation of the future house with concrete mortar.
Even doing all the work with your own hands, it is necessary to fill the grillage at a time. They also make concrete with their own hands, using crushed stone of the fraction 10/20, cement grade M 500 and sand in a ratio of 5:3:1.
Concrete gains full strength after 28 days. During this time, the concrete must be maintained. In wet weather, the surface is covered with plastic wrap, and in hot weather - with sand or wet sawdust. Formwork can be removed two weeks after pouring is completed.
One of the most popular types of foundation for a personal structure is a strip foundation. It should be said that in some cases, when the situation is unfavorable for geological reasons, it is not possible to apply traditional technologies. For example, several characteristic phenomena may be present at the site of future construction:
- the soil, in its upper layers, may be with an increased coefficient of frost heaving;
- the soils of the region where the object is being built have a decent freezing depth;
- the outer layers of soil are endowed with a minimum bearing capacity due to the ultimate compressibility of these layers, while strong soil is much deeper;
- the presence of a slope in the construction site (hills, river banks, etc.).
In the case when the project of the future building provides for a basement or underground garage, the foundation must be deep. If these points are not reflected in the project, then the cost of manufacturing a strip foundation, which is characterized by a sufficiently strong deepening, may be unjustified.
The surest way out of this situation is the construction of a columnar - tape type foundation. Let's figure out what kind of foundation it is and what are the basic rules for the technology of its construction.
The columnar - strip foundation is also called combined, due to the fact that this foundation is, in fact, a mixture of ordinary columnar and strip foundations. The main idea here is that it is necessary to focus on the strong and durable soil of not the entire foundation, but only a few of its columnar supports.
In order to transfer the load from the walls of the building to the columnar supports, a monolithic reinforced concrete screed is made above the supports, while the entire foundation is formed into a common structure. It is customary to classify such a screed as a grillage, in fact it is a classic tape-type foundation, which does not rest on the ground under it, but on columnar supports.
In the case of building a columnar - strip foundation of a house on heaving soils, the base of a monolithic screed is performed above the soil level in order to leave a gap under the grillage. When building on slightly heaving soils, it is recommended to deepen the tape by fifty centimeters.
Columnar - strip foundation can be called a hybrid pile-strip foundation which is built on bored piles. We can say that both types of foundation, in fact, are one and the same. But, a reinforced concrete drill pole, in the case of a columnar - tape base, can be replaced with concrete blocks, and sometimes bricks.
Let's say right away that it is not advisable to carry out the construction of a columnar - tape base for an object with heavy walls (for example, made of bricks). But wooden, foam block and aerated concrete walls, a raised grillage can easily withstand.
What are the benefits of using this technology?
- reduction in the volume of work and the number of building materials, which ultimately leads to a decrease in the cost of the construction itself;
- significantly reduces the time for the construction of the foundation.
Video. Columnar - strip foundation.
The foundation of a columnar-tape type can be built by any person with their own hands, without involving specialized equipment and experienced builders in the work.
Instructions for the construction of a columnar strip foundation with your own hands.
Before you start building a columnar - tape base, you need to perform preparatory work. The construction site is cleared of trees and shrubs, as well as debris. Next, it must be leveled and marked out using stakes and a rope.
At the end of the preparatory work, certain actions are performed:
1. Wells for the foundation.
At the corners of the future structure and under all the main walls, which will be load-bearing, there are vertical supports, at a distance of one and a half to two meters from each other. This distance, as well as the design of the grillage, is established on the basis of calculations that take into account the mass of the object's structures, the characteristics of the soil at the site, and some other points.
To perform the correct calculation of the column-strip base, you need to seek help from a specialized company, where experienced specialists in this field will perform work on such a calculation.
During the construction of a recessed grillage, before drilling the pillars, a trench is dug forty to fifty centimeters deep, and the width of this trench is seven to ten centimeters more than the width of the grillage. In the case of a suspended grillage, instead of a trench, sand is poured, which is removed at the end of pouring with concrete.
The construction technology of a columnar - strip foundation provides for the implementation of broadening at the base of the pillars - supports. This method will allow:
- without increasing the diameter of the column, increase the bearing area of the base;
- to avoid extrusion of the column during frost heaving, the forces of which act on the side surface of the support along a tangential trajectory.
The TISE drill, tested in practice, is successfully used to perform this widening. The weight of the tool is about seven kilograms, and drilling a well by hand is not difficult. At the final stage of drilling a well, a folding knife is used, it performs an increase in the cavity at the base of the hole.
At the first stage, the drill is rotated clockwise, and the folding knife is removed from the tool, and an initial well of twenty-five centimeters in diameter is formed. During drilling, the tool is periodically removed from the well to remove the goaf.
At the moment when the well is deep enough, the tool is removed from it and a folding knife is mounted on the drill. When drilling continues, the folding element will form a hemisphere with a diameter of sixty centimeters at the base of the well. But the drill in this case already rotates against the clock.
At the base of the pillar, made with a TISE drill, there is no need to make a pillow of sand. In case of insufficient strength of the soil at the base, it can be strengthened with cement laitance. In wells of a different type, it is recommended to make a backfill twenty centimeters thick, consisting of wet coarse sand.
If this tool is not available for drilling a special well, the pillars are dug out manually.
2. Types of formwork and its construction.
During the construction of a columnar - strip foundation, two types of formwork are used:
- hard type, made of asbestos-cement, sometimes polymer pipes, boards, plywood;
- flexible type, made from interconnected tubes, from a PVC film or roofing felt, twisted and sewn together.
For pillars and the tape part of the foundation, the formwork can be made from boards. The boards are covered with a film to save them and use them in the future. The entire formwork structure must be rigidly fastened. For this, the walls are supported with additional stops. Opposite walls are fastened with wire or boards.


3. Reinforcing cage.
The foundation during operation is subjected to loads, compression and tension. Rebar is used to strengthen concrete in tension. The diameter of the main reinforcement can be from 12 to 20 mm. For jumpers, thinner reinforcement is used. Class A - III reinforcement (ribbed) provides better adhesion to concrete and is used as the main one. Reinforcement class A - I (smooth) is used as an auxiliary.
The fittings are interconnected by means of a knitting wire or welding. The distance between the longitudinal (working) reinforcement is no more than 25cm. The height between the transverse (auxiliary) reinforcement is not more than 50cm.
When installing reinforcement, it is necessary to ensure the thickness of the protective layer. For the foundation, it is at least 35 mm. It is not allowed to leak the reinforcement into the ground, this will lead to corrosion.
The upper part of the vertical reinforcement of the pillars is bent at 90 degrees for further attachment to the grillage. The lower part of the reinforcement of the pillars is reinforced with a mesh. The grillage is reinforced with two reinforcement belts connected by clamps. In the corners, the reinforcement is overlapped.


4. Pouring concrete columnar - strip foundation.
The entire structure of the columnar-strip foundation is poured with concrete grades not lower than M200. If the TISE drill was not used, then concrete twenty to thirty centimeters thick is first poured into the well, then the pipe is raised - the formwork. Concrete in this case spreads, forming the sole of the columnar base.
After that, the entire remaining foundation is filled with concrete, while it is necessary to try to fill the pillars with concrete from the first run. Further, to release air, the mixture is pierced with a metal bar and compacted until cement milk appears.
Upon completion of the hardening of the concrete mixture, the formwork is dismantled, and the body of the grillage is pasted over with a waterproofing material.
 Columnar - strip foundation.
Until recently, pile foundations were almost never used in individual construction, with the exception of regions with a difficult climate and soils. The pile foundation for the house gained its popularity simultaneously with the technology of frame construction. It was the companies that produce light-weight houses suitable for year-round use that first began to use them quite widely.
An example of a finished pile foundation
They were looking for a way to reduce the cost of construction without sacrificing quality, and the solution turned out to be to replace the traditional strip foundation with a pile foundation.
It is far from always possible to directly support the foundation structures of buildings on the underlying soil layer. Depending on the conditions, the soil may be of little use for this, having a low or insufficient bearing capacity, an unstable nature of occurrence, being in the permafrost zone, and the like.
In such cases, the design of piled foundations and their installation is carried out, which allows for the transfer of load from the building to underlying, stronger and denser soil layers with predictable characteristics.
 Pile foundation project on shaky ground
 Pile foundations are widely used in construction, so a huge number of options have been developed that take into account almost any construction conditions and offer a variety of solutions, both taking into account technological capabilities and economic aspects.
Today, the foundation on piles is one of the most popular in the private and commercial construction market. Since in terms of its price indicators it turns out to be much more profitable than classical solutions, and in terms of its technical characteristics and service life it even surpasses traditional foundations.
In most Russian regions, pile foundations are used to build houses on soft soils. These will be peatlands and swampy soils. By the way, it will also be where the level of groundwater is quite high.
 Scheme of installation of a pile foundation
 A slab or shallowly buried strip foundation will be ineffective on such land, since the topsoil simply cannot withstand a large load.
The design and installation of pile foundations is regulated not only by the Construction Norms and Rules, in particular, SNiP 2.02.03-85, but also by other regulatory documents, which include, for example "Pile Foundation Design Guide". It sets out all the recommended solutions used for the device of this type of foundations, defines the parameters of the necessary survey work, methods for performing design and types of calculation and design work carried out.
The issues of calculation of piles by bearing capacity, calculation of pile foundations and foundations by deformations, general issues of designing pile foundations are considered.
 Finished pile foundation project
 Separately, design features in specific conditions, such as subsiding soils, swelling soils, undermined territories or seismic areas, are highlighted.

A pile foundation is a more complex system than just a set of piles, therefore, for the qualified calculation of other elements, other materials recommended for use are also used, for example, "Manual for the design of reinforced concrete grillages of pile foundations."
The use of regulatory literature makes it possible to ensure the high quality of design work and sound economic decision-making without compromising the safety and durability of buildings and structures.
That is what piles are used for. Vertical structures sink to a sufficient depth in the ground and transfer the load to the denser soil layers that are located below. The price of such a foundation is lower than for classical types of foundations with excavation.
Also, the installation of a pile foundation will be the best solution in permafrost areas and where there are moving soils. 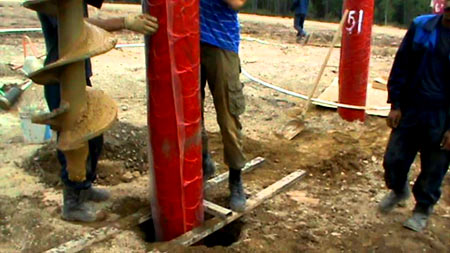
A holiday house on the banks of a river or near a reservoir is also better to put on a pile foundation. When using high-quality waterproofing, the structure will last much longer than other types of foundations.
Types of piles used
Pile foundations differ in several ways. A certain type is suitable for operation in specific conditions. The cost of arranging the foundation, which includes the required building materials and the work of specialized equipment, also depends on this.
According to the materials used
Piles can be made from various materials. For foundations for various buildings and structures, piles made of wood, metal, concrete and reinforced concrete, as well as combined types of piles, are used.

The latter type is considered one of the most reliable, since different materials corrode in different ways, as a result, they retain their original appearance longer and perform the main functions.
by immersion method
The first and main difference between piles is the use of fully finished units that are lowered into the ground and piles that require on-site fabrication.
The first type includes driven, bored and screw piles. To the second -
bored and combined.
Driven and bored piles are more often used in the construction of foundations in multi-storey buildings. They are very voluminous concrete or reinforced concrete beams. The price of the structures themselves is quite high, and their installation requires large construction equipment.
Rental of special vehicles for individual construction will cost a pretty penny. 
All piles are divided into two main types:
- Post piles that pass through soft and unreliable layers of soil and, ultimately, rest on hard rock.
- Piles that remain "hanging" in the ground. Such piles are used when solid rock is at an inaccessible depth or it simply does not exist, for example, in permafrost conditions, or in swamps and peat bogs.
In the first case, the entire bearing load transferred from the building to the foundation passes to the solid layers of rock, and the building, it turns out, has a reliable support under it.
In the second case, a different principle applies. The load is distributed evenly on all piles, and the piles are held in the ground due to the friction force between the surfaces of the pile and the ground. Both of them have proven themselves well and are used in construction on equal terms.
Read also
Depth of the trench for laying the strip foundation
Types of pile foundations
The pile foundation is a field of individual piles. Their number, the distance between the piles, the method of distribution and strapping is calculated individually for each house project. From above, each pile can have a small platform or rebar. This is necessary for the subsequent installation of the strapping.
Foundation on screw piles
Screw piles are the undisputed leader in the field of private construction. Most frame projects are based on a foundation on screw piles. The pile is a metal pipe, pointed at the bottom and with a welded helical blade.
In fact, this is nothing more than a large self-tapping screw, only without a hat. Such a pile is simply screwed into the ground. For this, construction equipment can be used, or it is possible to equip a pile foundation with your own hands. One of the most budgetary and labor-intensive technologies.
 Finished foundation on screw piles
 Screw piles can be combined. If the classic screw pile is a hollow metal pipe, then the combined one involves filling the void with concrete or reinforced concrete mortar.
The advantages of the foundation on screw piles include its low cost, the ability to install without the use of heavy equipment, use in permafrost and marshy soils.
The disadvantages of such a foundation are fragility, according to reviews, it can stand for about 70 years. Another drawback is that the foundation on screw piles without a grillage can only withstand lightweight structures, such as wooden or frame houses. For stone, brick or block buildings, it is better to use other, more durable foundations. 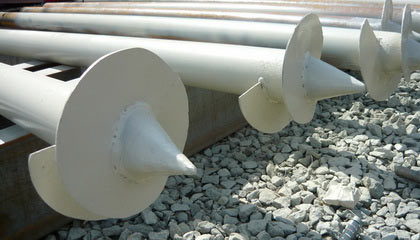
Foundation on bored piles
Bored piles are a type of piles that are made on site using concrete or reinforced concrete mortar and reinforcement. To begin with, wells are drilled on the construction field, marked out according to the drawing. Vertical shafts are reinforced with reinforcement and then filled with mortar.
Depending on the type of soil on which the foundation is being installed on bored piles, various casing materials can be used.
For example, in the case of loose and sandy soils, a special hollow pipe can be lowered into the mine. The technology allows insulating the wall with roofing material, roofing felt, polyethylene film. Depending on the material used, after pouring, the casing can be removed, or it can be left in the shaft, performing the function of waterproofing.
 Installation of bored piles
 Piles made according to the latest scheme, using casing-insulating materials, last longer than simple bored piles.
The advantages of such a foundation are ease of installation. One of the varieties of bored foundation is columnar. Such a foundation can be equipped without the use of special equipment. Dig holes for piles or drill manually, make a mortar yourself and pour the base.
Another advantage is the ability to put the house even in a place that is hard to reach for equipment, almost close to other buildings.
However, such a foundation will be short-lived and less durable. Without special waterproofing, flood piles quickly collapse. The disadvantages include the impossibility of their operation in regions where horizontal ground movements are observed.
 Scheme for the construction of a bored pile foundation
 Types of strapping used
The piles themselves are just pillars or racks. In order for them to turn into a full-fledged foundation, it is necessary to tie a pile foundation. The pile-grillage foundation surpasses strip and monolithic slab foundations in its characteristics. It is considered more resistant to any soil movement. Depending on the weight of the structure, different solutions are used.
Piles-columns
The simplest type of pile is a column pile, which is used as a foundation for a fence or a light summer house. It will also be a continuation and basis of the structure, which will be mounted around the pile. No binding is required in this case.
Beam strapping
It is most often used in the arrangement of a pile-screw foundation for the construction of a light frame or log house. 
The function of the grillage in this case is performed by the 200th larch beam. If you make a pile foundation with your own hands, then the timber should be laid on special platforms with which each pile is equipped, and securely fastened with bolts and ties. The joints of the two strapping elements are formed with a groove.
metal strapping
A grillage on a pile-screw foundation can be made of a profile, a channel or a corner. In this case, the installation takes place using welding.
It is also possible to fasten with bolts, if the pile-grillage foundation initially provides for such a design. To do this, each pile must be equipped with a small platform with holes for two or four bolts, as well as the strapping that comes with the kit.
 An example of tying a pile-grillage foundation
 In this case, the pile field must be installed with the minimum allowable error, otherwise the arrangement of the grillage will become impossible.
Monolithic grillage
The pile-grillage foundation is a hybrid of a pile foundation and a classic strip or slab foundation. In the case when special rigidity of the structure is required, the following scheme is applied: formwork is assembled on top of the piles and a monolithic grillage is made in the form of a slab or tape.
This design is best combined with bored piles. In this case, the reinforcing elements of each pile are brought up and become the basis of the grillage. At the same time, additional reinforcement of the grillage is also necessary.
Stages of work in the construction of pile foundations
Entrust to specialists or equip a pile foundation with your own hands - both options are possible. Work can be performed both using construction equipment, and use an electric or hand drill for holes, or even dig mines manually.
Land Surveys
The device of pile foundations takes place on rather difficult soils. To avoid errors in design and calculate the settlement of the pile foundation, it is advisable to order land surveys. Several drilled information shafts and a detailed analysis of a specialist, which will be presented in the form of official documents - soil maps, will make it possible to make an accurate calculation and determine the optimal depth of the shafts for piles.
In the event that a pile foundation is ordered without geological exploration, there is a risk of making piles of insufficient length.
 Scheme of the pile foundation
 The second problem that you may encounter is to rest against the rock in one of the sections of the pile field, which will not allow you to screw the piles to the required depth.
Design
The device of pile foundations provides not only for the process of physical work, but also includes a mandatory paper period. During the design of pile foundations, calculations are made that allow you to determine the size of the pile field, the depth of the shafts and their number, the distance between the piles.
Lighter structures allow piles to be placed in the foundation at a distance of 2.5 meters from each other. The calculation of the foundation for heavy structures and on difficult soil requires an increase in frequency - the distance can be reduced to 1 meter. Also, piles can be lowered into the ground not vertically, but at a certain angle, which strengthens the structure.
As a base for a house, a strip foundation is used, perhaps more often than any other types. Its design is not too complicated and at the same time quite reliable. It is used for both stone and wooden buildings. Do-it-yourself strip foundation installation is not a particularly complicated and quite feasible enterprise.
Site preparation and foundation marking
The construction site must first be cleared of debris. It is also worth removing a layer of turf. Next, you can start marking. It is done using wooden pegs and an inelastic cord:
- On the ground mark the location of two corners, the long wall of the house;
- Further, from one of the marks, equal distances are measured in both directions along the wall line;
- Pegs are stuck in these places;
- A rope is attached to them in turn with a nail tied at its end and two arcs are drawn;
- The corner point of the house is connected to the intersection of the arcs;
- The resulting line is continued and the width of the house is measured on it;
- In the same way, find the location of the fourth corner.

Foundation trench
Both the outer perimeter of the future concrete tape and the inner one should be marked. The basement should be 15-20 cm wider than the walls of the house. It is best if the walls of the trench will have a slope, so that the sole of the future base under the house is wider than the top of the basement.

Formwork installation
The strip foundation is poured into the formwork. It is usually made of wooden shields, between which spacers are placed. From the outside, they are reinforced with struts. In the event that the soil on the site is characterized by increased flowability, the formwork is placed at the bottom of the trench. On rocky or clay soils, the shields can be attached to the edges of the ditch. The height of the formwork above ground level should be equal to the height of the plinth plus five centimeters. For more information on how to make a formwork for the foundation, read here.
Tip: The formwork panels should be knocked down so that the nail heads are subsequently on the inside. Shields from the side of the trench can be covered with plastic wrap. In this case, the wood will not absorb moisture from the solution.

Reinforcing cage
The construction of the strip foundation begins with the installation of a "sand cushion". Subsequently, it will act as a shock absorber during the movement of the soil during the spring heaving. Its thickness depends on the height and width of the foundation and most often is about 20 cm. Sand is poured in layers of 5 cm. Each layer is compacted by pouring water from a hose. Either a plastic film or a waterproof dornite is laid over the sand. In order for the reinforcement not to touch the sand, the bottom is poured with a five-centimeter layer of concrete. You can also simply install wooden blocks 5cm thick. The reinforcement of the strip foundation is assembled from metal rods 6-8mm (for transverse and vertical) and 10mm (for longitudinal).

Important: It is not advisable to weld reinforcing bars, since at the joints, they will certainly begin to rust. It is better to fasten them with knitting wire.
Pouring the foundation with concrete mix
Pouring concrete mixture is the next stage of such an event as a do-it-yourself strip foundation. The solution is usually prepared from the following components:
The components are mixed in a concrete mixer. It is impossible to use too liquid mortar for the construction of the foundation (after compression in the hand, a homogeneous sticky lump should be obtained). Lay the mixture in the formwork in layers of 20 cm. Each of them needs to be tamped down.

Formwork can be removed on the second day after pouring. For two weeks, the foundation is moistened every day with water from a hose. Further, two layers of roofing material are glued on top of the basement, on bituminous mastic, thus making the foundation waterproofing and then warming is carried out.
On this, the do-it-yourself strip foundation device can be considered complete. After another two weeks, you can start laying or pouring walls.
Related video:
When building light houses (wooden, panel, frame), a columnar foundation is most often used. 
Pillar foundation - a set of pillars dug into the ground, located under the intersections of the walls resting on them, and in the spans.
The upper part of the column is the head, the lower part is the base.
Do-it-yourself column-strip foundation
The house rests on the heads, so it depends on their level whether the floor of the house will be even. The head should rise above the ground at a distance of 0.4-0.5 m, which avoids dampness and extends the life of the wooden house.
The cross section of the foundation pillars can have a different shape - square, rectangular, round.
In the case of self-construction, pillars that are round in cross section are most often chosen, since wells can be drilled with a hand drill (standard diameter is 150 mm, 200 mm, 250 mm, 400 mm).
The material of the foundation columns can be different:
- wood is not the most reliable material, as wood is prone to decay.
To increase the service life of wooden foundation columns, they are treated with an antiseptic, waterproofing is used, and fired;
- bricks - durable, but not convenient when erecting columns: it is impossible to lay in the well itself; forming on the surface and lowering into the well is laborious;
- monolithic concrete is the best material, subject to reinforcement.
Such a foundation column is easy to perform (concrete mixture is poured into a prepared well), strong in compression and tension, will not crack under the influence of frost heaving forces, will not rot.
The cross section of the foundation pillars can be not only constant, but also variable (have an extension in the lower part), which increases the base area and reduces the load on the soil.
The shape of the column, expanded to the bottom, can significantly reduce the impact of the tangential forces of frost heaving and does not allow the foundation to be pushed out of the ground.
Such pillars are laid in the following ways: 

Advantages of a columnar foundation:
- ease of construction - all work can be done by one person manually: drill a well with a drill, prepare concrete, tie reinforcement, pour a column.
At the same time, all work can be done in small portions - pour one column at a time;
- profitability - a significantly smaller amount of concrete and reinforcement is required compared to other types of foundation;
- convenient to use when building a house on a slope;
- it is possible to use at deep occurrence of dense soil.
Disadvantages of a columnar foundation:
- insignificant (compared to other types of foundation) bearing area;
- suitable for the construction of only light houses - wooden, frame, panel;
- in a house built on a columnar foundation, it is impossible to equip a basement;
- cannot be used in case of high groundwater levels, as the base will be saturated with moisture and the posts will begin to sag.
In this case, the wells during the construction process will be filled with water, which will not allow pouring the columnar foundation.

The foundation consisting of pillars is very often used as a foundation for small houses and various outbuildings.
Its main advantages are ease of construction and low cost with a sufficient degree of reliability. In this article we will try to tell you in as much detail as possible about how to make a columnar foundation yourself.
Site preparation
As with any other foundation of the house, the place for the columnar foundation should be carefully prepared beforehand. Remove all debris from the site, uproot stumps and bushes. It is desirable, but not necessary, to also remove the top sod layer of the earth along with the grass.
Marking under the foundation
The next step is markup.
This is necessary in order to obtain the most even, and therefore reliable pillar foundation. Let's look at how to do this task with your own hands in more detail, since this stage is actually very important.
Pre-mark the location of the two corners along the longest wall of the house. The resulting points are connected by a line.
Next, they find the third and fourth corner of the future building, using the "Egyptian triangle" method or the "two arcs" method. After that, pegs are driven into the corners found and connected with a cord. Further, also with the help of pegs and a cord, the outer border of future pillars is marked.

Pillars should be located in the corners of the house, as well as at the intersection points of the walls.
The rest are placed along the perimeter of the outer walls and under wide piers at intervals of 1.5 - 2 meters. When marking, first mark the location of the pillars on one side of the building, then, strictly opposite them, on the second.
The same is done on adjacent walls.
Pillar pouring
Most often, a simple pillar foundation is poured using formwork. Sometimes asbestos-cement pipes or cross-linked roofing material are used instead. Previously, pits are dug in the marked places, the depth of which should exceed the freezing point of the soil in this particular region by 20-30 cm.

Important: Pits are made in the form of a truncated pyramid.
The diameter of their soles should not be less than 60 cm, the diameter at the height of the future grillage is at least 30 cm. This will prevent the posts from being pushed out of the soil during its heaving in the spring.
After the holes are dug, the actual construction of the pillars begins. This is done in several stages:
- Crushed stone is poured at the bottom of the pit with a layer of 25 cm;
- Formwork knocked down from boards is installed in the pit (In this article you can learn in more detail how to build formwork under the foundation);
- It is imperative to make reinforcement of the pillar foundation.
The frame can also be made by hand. There should be four steel bars (12mm) for each pillar, read here how to choose the right reinforcement for the foundation. They are connected by means of steel clamps at the top and bottom.
Do-it-yourself tape-column foundation
The resulting structures are lowered into the pits. The rods should protrude 15 cm above the surface of future pillars for connection with the reinforcement of the future grillage;
- The concrete solution is poured into the formwork.
Tip: Do not use welding when making reinforcing cages. Otherwise, in the future, the rods at the junction will begin to rust.
Most often they are tied to clamps with wire.
After a couple of days, the formwork panels can be removed. The gap remaining between the concrete and the walls of the pit is covered with soil and carefully compacted.
grillage device
A grillage is called a concrete tape that connects the elements of a columnar foundation into a single structure.
It is also not too difficult to arrange it with your own hands. First, formwork is installed on the pillars. It is knocked down from wooden shields. Bars 3-5 cm thick are laid on its bottom and a reinforcing cage is installed on them. After that, it is connected with the frame of the pillars. At the next stage, concrete is poured into the formwork and, after the concrete has gained strength, the foundation is waterproofed.

This is how a reliable columnar foundation is arranged.
Even a completely inexperienced builder can build it with his own hands, since this type of foundation for a house is considered to be structurally the simplest.
Before proceeding directly to the construction of the foundation of the house, it is necessary to perform its calculation. To calculate the foundation, it is necessary to estimate the weight of the structure and compare it with the bearing capacity of the soil on the site.
This must be done to select the optimal type of foundation (tape, columnar, slab, pile, screw), and later to determine the area of the base of the foundation.
The calculation of the foundation will consist of the following steps
- We determine the weight of the house without taking into account the foundation.
- According to the tables, we determine the snow and wind loads.
- We select the optimal type of foundation.
- We calculate the area of the sole of the foundation, taking into account the bearing capacity of the soil.
At calculating the foundation for the house, in addition to the weight of the building itself, it is also necessary to take into account snow and wind loads, as well as the approximate weight of the furniture and equipment that will be located in the house.
 House weight without foundation.
If you have an estimate, then it is enough to find out the weight of all materials. If not, then you will have to create it yourself. To do this, we calculate the volume of each material required for construction, find out the weight and add up.
This way you get the total pressure on the foundation of the house.
Here we will not give a lot of any materials, because. every year their choice becomes more and more diverse. We list only the main elements of buildings that we need to take into account before calculating the foundation of the house.
- Wall weight depends on the building material from which they are made.
- Pressure from roof elements. The roof structure includes - rafters, lathing, roofing, insulation.
- Interfloor ceilings determined by the material of the floors themselves and the density of the insulation used.
- Operational or payload. This includes the weight of furniture, clothes, various household appliances, i.e.
everything that is not part of building structures. It is generally accepted that the load is distributed evenly over the entire floor area. On average, for the basement and interfloor floors of residential buildings, it is 210 kg / m2, for the attic floor 105 kg / m2.
Column-strip foundation: construction technology
In this SNiP in Appendix 5, there is a map by which you can determine this data in your area. We present only some data for various Russian cities.
Please note that the values are given for the horizontal projection i.e.
snow cover presses on the roof only from top to bottom, therefore, when calculating, it is necessary to take not the roof area, but only the area of the horizontal projection.
The calculation of wind pressure is quite complicated and depends on many factors.Such factors include location relative to the direction of the wind, the material of the walls and roof, the shape of the structure itself, etc.
where h is the height from ground level to the top of the building, S is the area of the building.
After you have calculated the weight of the whole house, you need to choose the optimal type of foundation and calculate the foundation.
Foundation calculation example
Now let's calculate approximately what is the mass of a 6x6 house made of rounded logs.
Pine wood of natural moisture content.
We got that the total mass of the house is 13384 kg.
36 m2x210 kg/m2=7560 kg
36 m2x105 kg/m2=3780 kg.
Summing up, we get 11340 kg.
Now let's find the load from the snow cover. Let our house be in Moscow, the area of the horizontal projection of the roof is 49 m2.
According to the table, we find that Moscow is in the III climatic zone and has a snow load of 180 kg / m2.
49 m2 x 180 kg/m2=8820 kg.
Let's find the wind load. Our house has an area of 36 m2.
Height 5.5 m.
(15x5.5m+40)*36m2=4410 kg
Summarize:
The mass of the house is 13384 kg. Loads: useful - 11340 kg, snow - 8820 kg, wind - 4410 kg.
Summing up, we get 37954 kg. It is also necessary to add 30% for possible errors in the calculations. As a result, we get what is 49340 kg.
Now we need to choose what type of foundation is optimal for us.
In order to determine this, it is also necessary to know the depth of the foundation, which can be read in previous topics.
Suppose that we have sandy soil with a bearing capacity of 2 kg / cm2. If we divide the load on the foundation by the bearing capacity of the soil, we get the area of the base of the foundation.
49340 / 2 \u003d 24670 cm2.
Knowing the area that the foundation should occupy, you can choose the most suitable foundation.
An example of calculating a strip foundation
 To do this, we divide the area of \u200b\u200bthe sole of the base by the length of the strip foundation, and since
in the house there is also an internal load-bearing wall, then the length will be 30 m or 3000 cm.
24670/3000=8.2 cm. We got that the minimum width of the strip foundation will be a little more than 8 cm.
But the width of the base should be greater than the thickness of the walls, and the house is made of logs with a diameter of 20 cm, then the minimum width should be taken more than 20 cm.
We calculate the required amount of concrete. In sandy soils, the foundation can be laid to a depth of 0.5 m.
30 x 0.5 x 0.2 = 3 m3.
An example of calculating a columnar foundation
 We will make poles with a step of 1.5 m. Thus, we need 19 pieces.
You can take more quantity, then the diameter of the pillars will decrease. If you divide the total area of the foundation by the number of pillars, then get the area of \u200b\u200bthe sole of one column.
24670/19=1298.4 cm2.
Taking the root, we get a pillar measuring 36x36 cm.
The columnar foundation must be laid to the depth of freezing of the soil. For Moscow, approximately 1.4 m. Let's calculate the required amount of concrete.
0.36x0.36x1.4x19=3.4 m3.
Thus, we got that in this case, a strip foundation is more profitable.
It should be noted that the calculation was made for sandy soils, where the depth of the strip foundation is minimal. If the freezing clay soil is taken into account, then the depth of the foundation can increase by 2-3 times, and therefore the consumption of concrete will increase.
Therefore, do not be lazy and calculate which basis is best for you.
How to make a columnar foundation
Greetings readers and visitors to the my-big-building.ru blog. Today we will consider the device of columnar foundations and how to make a columnar foundation correctly. The use of columnar foundations in private housing construction began a very long time ago and is rooted in the depths of centuries.
Column foundations are pillars or supports spaced at certain intervals and connected from above by reinforced concrete foundation beams or other lintels, directly on which the main structures of the building are erected.
Column foundations are easily and quickly erected, and in terms of material consumption and labor costs, they are much more economical than strip foundations.
In some cases, with a deep foundation, 3-5 times. If we take as a basis that the cost of the zero cycle of building a house can reach 25% or more, then the money savings are obvious.
When is it advisable to install a columnar foundation.
- Heaving soils, with their deep freezing, in the construction of chopped, panel and frame houses without basements.
- Solid soils serving as the base of the foundation should lie at a depth of no more than 2-3 meters.
If necessary, deep laying of columnar foundations, to a depth of more than 3 meters. their economic efficiency decreases. In this case, it is recommended to lay pile foundations.
One of the advantages of column foundations is that soils serving as a base under individual supports work better than under solid foundations, thus reducing the likelihood of settlement of the entire house structure.
When building houses on a steeply dipping terrain, it is necessary to take into account the possibility of soil shift - a consequence of the lateral pressure of frost heaving forces.
In this case, the area of support of the foundation, if necessary, increases. It is rather difficult to calculate this pressure value.
- In horizontally moving soils, due to insufficient resistance to overturning and damping of lateral shear.
- On weakly bearing soils, when constructing houses with heavy walls.
It is worth remembering that when constructing columnar foundations, difficulties arise with the construction of the base.
Filling the space between the pillars, the wall and the ground is a rather complicated and time-consuming task.
Follow the continuation in the section "Foundation".
Construction of a pillar foundation - basics and subtleties
A columnar foundation will be an ideal solution for light, small buildings on unstable ground. It is not difficult to build it alone, and much less materials are required than for a tape one.
Of course, a do-it-yourself columnar foundation will be much more economical if you choose the right materials and familiarize yourself with the construction technology in detail.
Foundation marking and site preparation
Foundation work always begins with markings.
At the site of the planned building, a 20 cm thick layer of turf is removed, the soil is leveled and the contours of the building are marked. Foundation pillars must support all building corners, wall intersections, and load-bearing lintels. All these places must be marked with pegs in order to start digging holes. Pillars must be placed in a straight line, and not exceed a distance of 2.5 meters. All calculations must be made accurately, otherwise, after the foundation has been erected, it will be more difficult to redo the structure.

Foundations of this type can be shallow - 40-70 cm, and standard depth - from 1 meter.
The composition of the soil means a lot here: if the terrain is rocky or sandy, a shallow foundation is needed; in clay areas with high groundwater, it is necessary to dig the pillars as deep as possible. To install supports, it is not necessary to dig holes: if possible, the poles are simply hammered using special equipment.
But, of course, digging holes is much cheaper than using machinery. In order for everything to work out the first time, it is recommended to carefully study how to make a columnar foundation with your own hands.
Concreting of foundation pillars
- asbestos pipes;
- brick;
- concrete blocks;
- metal pipes;
- concrete mixture and reinforcement;
- skinned logs.
If you plan to make a building out of logs, asbestos pipes with a diameter of 20 cm are best suited for the foundation.
The holes should be slightly larger than the posts in diameter. Coarse sand is poured to the bottom and a pipe is inserted. A little solution is poured inside, and then the pipe is slightly lifted so that the mixture spreads well. After that, the pipe must be lowered into place and pressed down with force. Next, pieces of reinforcement are inserted into the pipe for strength, crushed stone or rubble stone is poured in and filled with mortar in several passes. So the base of the foundation will become as strong as possible. If the concrete is poured all at once, voids may form in the pipe, which will reduce the reliability of the support.

Concrete column
If there are no asbestos pipes, you can make a pillar foundation with your own hands based on concrete mortar.
This process is quite simple and inexpensive, and you will need quite a bit for it:
- roofing material roll;
- scotch;
- concrete mixture;
- electric vibrator;
- fittings 14 mm and wire.
It is necessary to form a pipe from roofing material; for this, a piece of material is folded in half and secured with tape.
The diameter of this design should be approximately 20 cm. The roofing material is lowered into the pit until it stops and a reinforcing cage tied with wire is inserted inside. The frame needs to be made 30 centimeters longer than the roofing material pipe so that it looks out of the pit. When everything is ready, pour the solution: first a little to the bottom so that it fills all the holes, then to the top of the pit.
The concrete mixture must be compacted with a vibrator, and then allowed to dry well. Similarly, do-it-yourself columnar foundations are made from rubble stone, concrete slabs and bricks.
Important! If such a foundation is made in the fall, it cannot be left until spring without an appropriate load. Freezing of the soil, followed by thawing, can disrupt the integrity of the foundation or even push the pillars out.
Arrangement grillage
For the further construction of the building, a grillage is needed - a structure made of strong horizontal bars connecting the pillars. As a rule, a grillage is equipped at a height of 30 cm above the ground, but sometimes it is also made at ground level.
Previously, only timber was used in construction for grillage, but now it is increasingly made of concrete, pouring mortar into the formwork.

Fastening the grillage to the pillars must be carried out with the highest quality, because the stability of the building depends on their reliability.
To make a concrete grillage, you need to fix a wooden formwork on the foundation pillars along the perimeter of the structure. After that, it is poured with a cement mixture and leveled. For greater strength, it is recommended to compact the mixture with a vibrator, and the concrete should dry for about a month.
Subject to the technology of the process, the foundation on the pillars with your own hands will securely hold the structure for many years.
Video on the construction of pillar foundations
How to make a columnar foundation, how to make a bathhouse on pillars with your own hands
For the construction of a column foundation for a bath, the same materials are required as for a strip foundation. But the columnar foundation two times cheaper your competitor.
Used as columns wood piles or metal pipes that are filled with concrete.
If these materials are very tight, then boulders can also be used.
Video: the simplest columnar foundation
These posts are placed at the corners of the walls, under the frame posts, beams and all places with a decent load. If the distance between the main pillars is more than 2 meters, then additional pillars are placed between them.

Main pillars bricks are usually made with dimensions of 38 * 38 cm, additional intermediate - 36 * 25.
A pillow of sand is made under the brick pillars to the middle of the trench, the sand is rammed in layers of 10-15 cm, while watering abundantly.
It happens that for the construction of a columnar foundation for a bath, wooden pillars are used, previously impregnated with an antiseptic and covered with tar.
In the common people, such pillars are called "chairs" .

A wooden cross or butt part with a diameter of 0.2-0.4 m is impregnated with an antiseptic and dried. Can be used as an antiseptic blue vitriol. After treatment with an antiseptic, the post is wrapped in a film or roofing material or covered with tar.
Ancient Russian craftsmen burned the ends of the pillars on fire until they were charred, and then smeared them with turpentine. All this was done so that the wooden poles would not rot in the ground.
As a rule, wooden columnar foundations very short-lived. Their resource is about 5 years, oak - up to 10 years. Therefore, for a bath where dampness is constant, it is best to use concrete poles or asbestos-cement pipes that are filled with concrete.
The erection of concrete pillars for a columnar foundation
Method one
First, markings are made for the foundation and round or square holes are drilled with a drill. holes in the ground.
The walls must be vertical, and the cross-sectional dimensions must be at least 30 cm. After that, we lubricate the formwork with some kind of lubricant that does not harden, and install the formwork.
We lay the reinforcement and pour concrete, ram and wait until it hardens.
To increase the bearing capacity columnar foundations, the lower part of the holes made by the drill can be enlarged and filled with crushed stone or gravel, which is well rammed, and the columns on top are connected with a reinforced concrete belt, which is called a grillage.

Method two
Also exists formwork manufacturing method from sheets of roofing iron, which are bent in the form of a pipe with a diameter of 20 cm.
Such concrete pillars are very strong and prone to heaving soil in winter.
That the ground did not freeze to the pillars
To winter the soil did not freeze to the posts.
it is necessary to lubricate the asbestos-cement pipe with mineral oil, and only then install it in a hole in the ground. Rebar is inserted into the formwork and poured with 2-3 buckets of concrete. Then, after the concrete has been compacted, the formwork can be removed. Under the outer wall of the bath and the inner wall of the steam room between the foundation pillars with a depth of 25-30 cm, you need to lay out brick walls one brick wide above the ground level by 20-40 cm.
These walls are leveled with cement mortar and without fail cover with waterproofing. The clay pavement is laid and rammed from the outside.
Sometimes summer residents between the foundation pillars make some kind of embankment from scraps of slate, gravel or slag.
Construction of a combined strip-column foundation
For this, they construct timber formwork. They are placed so that the protruding ends cover the pillars. Inside this frame, slate trimmings are placed, as a rule, in two rows, while its lower ends are stuck into the ground and rammed, and insulation (for example, expanded clay) is laid between the slate rows.
Copying materials from our site is PROHIBITED! © 2007-2015 belyi05