Contour wood carving pictures drawings. Ornaments for woodcarving: choosing the best for a beginner
Consider what wood carving stencils are, how they can be used and what they are. Today, this ancient craft captivates many, but it is a rather complicated and painstaking task, which requires not only talent, but also artistic skills. If everything necessary for this case is acquired and it is known how to work with each of the tools, then they are determined with a drawing.
Stencil pattern for drawing a picture on a tree
But it is not always possible to choose and draw the right one. In this case, they acquire stencils for woodcarving, which help the novice master to do everything correctly.
Consider what a stencil is. This is a device that helps to apply a pattern or identical characters to the surface. For example, they occupy a special place in this niche, as they are produced specifically so that the master can perform complex work intended for external walls.
Stencils for wood carving with a jigsaw exist for the following interior items:
- pilaster;
- towels
- brackets;
- and etc.
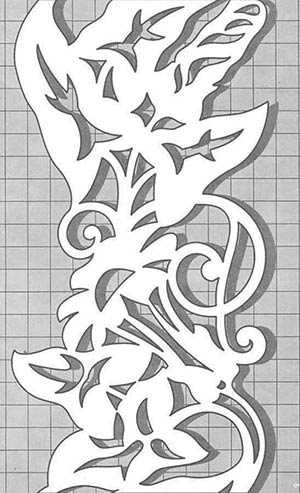 Stencil with a complex pattern for carving
 These are specialized templates, it is on them that three-dimensional ornaments and patterns are created. They greatly facilitate the task of changing the appearance of the interior. After all, you don’t have to look for a stencil, but you can simply download it or order it through the worldwide web. And then create your masterpiece.
How to choose and where to find a stencil
There are a large number of different patterns for: from simple ornaments to an animal, bird, person or a whole picture. When making a choice, you must remember the following rules: 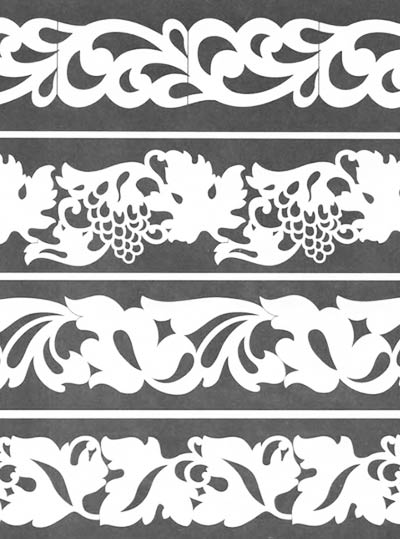
- if they are held in their hands for the first time, they do not acquire the template of an old painting or engraving, since it is quite difficult to work on it and it is possible to spoil the source material;
- for a certain type of thread, there are stencils;
- in order to perform the work accurately, all lines on the source material are transferred accurately.
 Stylish stencil ornament for carving
 And in our time it is available through electronic libraries that publish complete editions. Therefore, you can look into these rare publications and "take inspiration" from there. An artist, decorator, designer or woodcarver will appreciate such a source of information, as it makes it possible to understand and feel not only the past era, but also the spirit of that time. After all, it was then that everything was made by hand, and objects were decorated with bizarre patterns.
Before choosing a pattern, compare the dimensions of the workpiece and the image. For a correct and good reading, the following points must be remembered:
- if the product is large, then do not choose an openwork or small ornament;
- a large drawing is not suitable for a small one;
- proportions must be observed.
 A selection of various geometric carving patterns
 All this applies not only to the floral pattern, but also to the image of an animal, bird and ethnic ornament.
Wood has always been considered a good material for interior and exterior decoration. Therefore, today, wood carvings, photographs, drawings and sketches are used to create an improved interior. Following this direction, furniture sets and interiors are decorated using the latest technology, techniques and elements that allow obtaining products with excellent appearance and quality, as well as having high artistic value.
Wood is a fairly light material that can be easily processed and has been used since ancient times to decorate palaces, temples, and houses. With a great desire, craftsmen from all over the world apply patterns for woodcarving, using natural material in their work to create a unique stylistic image in the interior of the house.

Relief carving is a rather laborious type of carving
For decor from wooden elements using carvings use different woods:
- Linden. A very soft material for carving, from which you can get small items in the form of photo frames, various boxes, household utensils with patterns. They just draw attention. This material is perfect for learning woodcarving, as it has a soft pliable wood structure and a beautiful color on the cut.
- Birch. It is an excellent raw material for obtaining a dazzling overhead decor or creating excellent souvenirs.
- Nut. Solid material, very good in processing and polishing. An extensive range from small items and furniture decor to a variety of sculptural compositions.
- Pear. Unique material, almost does not crack. They are used to create exclusive decorations and souvenirs.
- Alder. It is considered an aristocratic tree. Wood has a variety of colors from rich red and purple to black. This often replaces valuable tree species.
- Pine, yew, spruce, cedar. These types of tree species are used to form massive carved sculptures, architraves, which are used in the design of cornices, home decoration.

Carving is used to decorate the outside of the house due to various ornaments and figures.
Variety of wood carvings
In the modern world, more than one type of manual woodworking technique can be used. Of these, you can focus on such ways:
- Through carving. It is characterized by the complete removal of wood chips from the boundaries of the pattern. There is a simple look and openwork with a variety of heights and edges. Thanks to this technique, frames, linings, doors, decorative elements are made. If you want to do wood carving in an oriental style, then a jigsaw will come to the rescue.
- Thread with flat notches. It is characterized by the presence of a flat surface into which the thread elements are deepened. There are several subspecies of thread - contour, when, thanks to the grooves of a semicircular or triangular section, patterns are obtained on a flat surface; bracketed, when the pattern is obtained from semicircular notches; geometric, when several types of elements are used for a drawing - pegs and a trihedral pyramid buried in the middle. Patterns are made with a wood carving knife - a jamb. In this case, various figures are obtained in the form of rhombuses, chains, honeycombs. Black-lacquer carving is also performed, when the front side is covered with black paint or varnish, and then grooves are cut out.
- Relief carving. Elements are located on the same level with the front surface or above. This is a rather laborious type of carving. Thanks to this type, images of coats of arms, various ornaments, and emblems are created. Subsequently, the image is completed by the play of light and shadow.
- Carving for home decoration. They are used to decorate the outside of the house due to various ornaments and figures that are located on the back of the wooden elements. They decorate cornices, porch posts, balusters.
A stencil for wood carving always comes to the aid of the master. In this difficult matter, he is always an indispensable assistant.
Varieties of stencils
Wood carving stencils are used to perform rather difficult and painstaking work, which will then decorate the house. It is divided into the following types:
- stencils designed for ribbon ornament, platband, pilasters;
- stencils for carved boards - depict ornaments;
- stencils for brackets, rosettes, balusters and the like.
What stencil is preferred for woodcarving?
To select the right stencils, you need to follow a few rules:
- you need to choose the stencil that you can work with, especially if this is done for the first time, do not think that this is an easy job - you can ruin the material;
- for cut woodcarving, you need to choose only the types of stencils that correspond to it, while trying to transfer the drawing more accurately and not go beyond its scope, otherwise the work will be sloppy.

You need to choose the stencil with which you can work
By what parameters to choose a template for woodcarving
Firstly, for large wooden elements, it is necessary to choose large stencils, otherwise the elements will be small and not visible. But for caskets and frames, patterns are chosen more complicated.
For different carving techniques, the appropriate schemes and patterns for woodcarving are selected:
- Slotted carving requires templates and stencils of good quality and fast work. After the drawing has been transferred, those areas that turn out to be through will need to be shaded.
- Geometric technique is the basis of woodcarving. When the sketch is selected, it is applied to the wood panel.
- Sculptural or relief carving is more laborious and requires certain skills from the master. First, the sketch is made on paper, but if this is a voluminous craft, then it is necessary to create a figure from a plastic material, for example, from clay.
Geometric wood carving is a complex process, the implementation of which requires certain knowledge from the master. This type of arts and crafts over a long period of its development has managed to influence the formation of several basic techniques that allow you to create really attractive and unusual sculptural compositions. In order to improve the skills of implementing geometric ornaments on wood, first of all, you need to study the methodology of this work and pay attention to the sketches available on the network.
Fundamentals of Geometric Woodcarving
Geometric wood carving lessons involve learning the basics of this arts and crafts. Thanks to this, you can acquire knowledge about the tools necessary for the job, the features of the choice of wood, the preparatory stage, the cutting techniques used and the safety measures applied.
Tools
Woodcarving, the geometry of patterns of which often strikes with its beauty and attractiveness, requires the selection of appropriate tools, such as:
- joint knife. It is characterized by a beveled blade that allows you to create geometric patterns - triangles, squares, lines, etc.
- Flat chisel. A small product that has a width of no more than 2 centimeters is best suited.
- Hacksaw. It is necessary for sawing out small parts of the workpiece or cutting off unnecessary wood elements.
- Round, square and semi-circular files. With their help, you can make notches and holes of certain shapes.
- Rulers. These tools are usually not used when carving wood. However, often geometric ornaments should be symmetrical. Therefore, it is impossible to do without a ruler in this case.
- Pencil. It is necessary for marking the previously selected workpiece. In this way, you can improve the quality of work and significantly reduce the time.
- Compass. This simple tool allows you to correctly mark the workpiece if a round ornament is created on it.
- Eraser. It is mainly used to correct lines made with a pencil. In addition, such a tool is required after completion of work, if some blots remain on the wood.
Thus, geometric wood carving does not require a large number of different devices. Often it can be done with a minimum set of tools.
Wood (how to choose wood?)
There are several types of wood that can be used to make geometric carvings:
- Solid. Most often, this type of wood is chosen by professionals. This is due to the fact that they have the relevant knowledge and experience. That is why, despite the complexity of working with hard rocks, they cope well with the task.
- Very firm. Most often, this option is chosen due to the aesthetic properties of such trees. Working with solid wood is difficult, even for professionals.
- Soft. It lends itself better to processing. That is why, if the master has no experience in creating sculptural compositions, it is best for him to dwell on this particular option. Soft blanks are made from linden, pine or aspen.

As a rule, getting blanks from linden is quite difficult. This is due to the fact that it is often used, including by professionals. The main disadvantage of pine is that it is very prickly when cutting. In turn, aspen is the best option, which allows you to end up with a really beautiful work.
Preparation for work
Starting the first lesson, you need to prepare for yourself the appropriate board of such overall dimensions:
- length: 170 millimeters;
- width: 110 millimeters;
- thickness: 20 millimeters.
Reference. Additionally, you will also need sketches of various geometric patterns that can be made on the workpiece.
A beginner needs to start work from the process of grinding a previously prepared plank. To do this, with the help of a ruler and a pencil, you need to draw many horizontal and vertical lines over the entire surface of the workpiece, so that you end up with even squares.

Next, you need to start drawing figures on the board in accordance with the previously selected sketch. It is best to start with the image of pegs, rhombuses, viteks, pyramids, stars, squares and sockets. Using this ornament, in the future it will be possible to create your own unique patterns.
Cutting technique
There are two main cutting techniques that allow you to create basic geometric patterns on wood:
- triangle cutting;
- straw cutting.
Interesting! Straw cutting is used to create squares. In all other cases, the triangle method is used. Geometric patterns for woodcarving can also be created by a combination of these two techniques.
Security measures
Geometric wood carving for beginners is a very exciting, but also quite dangerous activity. This is due to the fact that in the process of work the master needs to use a large number of various piercing and cutting tools. That is why he needs to follow the following safety rules:
- All movements must be carried out from the hand. This greatly simplifies the work and reduces the load on the shoulder girdle.
- The hand in which the cutter is located must be firmly pressed against the work surface of the workpiece.. This will help free up the movement of the brush.
- When the cutting process is in progress, the fingers of the free hand should not be on the workpiece.. Otherwise, they may be injured.
Thus, wood carving can be very safe if you follow the above recommendations from experts.
Watch the video tutorial of geometric woodcarving:
Basic patterns
There are several basic types of geometric patterns that are used in woodcarving. These include pegs, rhombuses, viteiki, pyramids, stars, squares and sockets. Having studied the features of creating each of these ornaments, the master can independently connect them together, making original and unique works of their kind.
Pegs
 In order to carry out woodcarving, you must first learn how to perform such simple actions as tattooing and trimming. To do this, you need to take a knife in your working hand. At the same time, her thumb should be located on the beveled handle.
Initially, you need to press on the cutter so that it goes deep into the wood by a few millimeters. After that, lower the blade at an angle so that it crosses the line of the side knife in accordance with the markings made earlier. Similarly, it is necessary to carry out a prick on the other side.
Pruning happens like this:
- The cutting part of the knife should be applied to the left side of the triangle. With its bevel, it should be connected to the top of the figure.
- The knife handle must be pulled back. In this case, it is necessary to observe a parallel between the right side of the ornament and the blade.
- At the end, you should press on the knife, returning the brush to its original position.. At the end, the nose of the knife should be on top. In turn, the cutting part will turn out on the right side of the triangle.
Since the trimmed triangle should eventually break off on its own, the pattern obtained as a result of these actions is called a peg.
Diamond
The rhombus, which is often used in wood carving, is a fairly simple figure. It consists of two triangles. They are interconnected by their bases.
Reference. The technology for creating rhombuses on a workpiece is the same as for a peg. First you need to cut the top row, then turn the board and proceed to the bottom of the figure.
Viteika
Another type of peg is the viteika. It is obtained due to the displacement of two triangles to the sides from each other.
Thus, by making a lot of twists, you can end up with a winding path on your workpiece. To do this, you first need to cut out the lower triangles, chop them off, turn the board and start creating the top row. After that, the so-called snake will remain in the middle.
Pyramid
 The pyramid is the first complex pattern that can be made with a wood cutter. It consists of several triangles, which must be arranged in a certain order in relation to each other.
In the center between the three triangles is the point of contact of the corners. That is why, when cutting, you need to make sure that the cutting surface of the knife is always at one end purely in the middle. Cutting should be carried out in the direction of the wood layer.
Star
 A distinctive feature of the asterisk is that it consists of more triangles than the pyramid. Despite this, the process of creating this pattern is similar.
To cut an asterisk, you need to make four consecutive triangles on the workpiece in the same way as described above.
squares
Unlike all previous ornaments, the creation of squares requires the use of a different technique, which is called straw. The pattern can be either the border of the entire work, or part of a more significant element of the picture.
The creation of a square is as follows:
At the end, a piece in the form of a straw should fall off the wood. If you process all the lines of the square in the same way, you can get an interesting pattern.
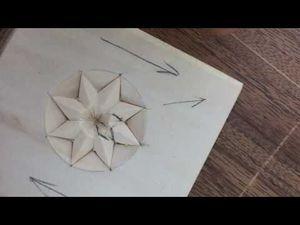
Socket
The rosette is the most complex ornament in the implementation of geometric woodcarving. To create it, you need a compass. With it, you need to draw a circle of large diameter. After that, you need to make another - 5 millimeters less than the previous one. Next, divide the circles into 16 even parts.
Once the above actions are done, you need to mark the points in the middle of each segment on the small circle. From these places, a line should be drawn to the nearest points on each side of the great circle.
At the end, having the markup, it remains to cut and chip off the triangles in accordance with the technique described above.
Practical lesson in geometric carving, making a box
Geometric wood carving of the box requires certain steps to be completed, such as:
- thinking over the ornament;
- drawing a picture on the workpiece;
- markup execution;
- cutting out the simplest shapes;
- creating more complex ornaments;
- removal of roughness with sandpaper.
The geometric tree pattern makes it quite easy to create. In order to complicate it, it is necessary to connect a large number of simple elements together. Additionally, you can watch a lesson on the Internet, which allows you to understand how the box is decorated with geometric ornaments.
Video material on carving a wooden box:
Conclusion
Almost anyone can learn to carve wood. In order to do this, it is imperative to first read the relevant theory. After that, based on the recommendations of specialists, you need to approach the process of acquiring practical skills. As soon as they are received, you can start independent work on creating beautiful wooden things decorated with original geometric carvings.
In contact with
You can make so many decorative items and useful little things from carved wood and plywood that it is stupid to limit the scope of the work. In fact, it can be absolutely everything that your imagination has enough for: caskets, covers for decorative and collectible books, lampshades, panels, shutters, furniture elements, platbands, cornices ... But the most attractive thing about creating exclusive works is that everyone can do them willing, if he makes a certain amount of effort.
Slotted wood carving: photos, drawings and sketches
The main key to success in creating interesting gizmos with slotted carvings is the choice of pattern. It is he who conveys the general concept and sets the aesthetic tone for the entire product.
The easiest way for beginners is to make geometric patterns, as in the photo.


Carved drawings of floral and animalistic themes are classic ornaments for any application.


Inscriptions - a modern version of the use of carving on wood and plywood. At the same time, you are unlikely to be able to find drawings and sketches on the net - they will have to be compiled purely individually for personal requirements for sizes, fonts, words.

Stencils for slotted threads
However, unlike cut-out inscriptions on plywood, drawings with plant, animal and fantasy themes can be found on the net. So feel free to choose your favorite stencils in the album, and there will be enough ideas for creativity for a long time!
The simplest sketches are suitable both for training at the very beginning of the manufacturing process, and can become separate elements of a complex design. For example, this is how carved houses are decorated.


More complex templates will require some skill and patience, but the result is worth it. Such pictures can serve as an independent product, even a gift.


Whole compositions with an idea and meaning usually serve either as a separate work or form the basis of the work.


Tools for slotted carving: jigsaw or router
However, the choice of drawing is only a third of success. Another important aspect that must be considered before starting the work itself. Namely, the choice of a tool that will be used for carving wood or plywood.
Equipment depends on:
- how thin the thread will turn out;
- the complexity of the pictures;
- cutting speed;
- accuracy of work.
Therefore, it is important to evaluate all the pros, cons, capabilities and limitations of each of the traditional sawing tools:
Jigsaw - a device for curly cutting out parts. It is quite laborious to work with a hand tool, but it allows you to very accurately cut out according to the drawing. The power tool allows you to quickly produce figured products from plywood, but requires caution.

A milling cutter is a tool that makes flat relief slotted carvings look thinner and more complete. It is with its help that it turns out to round the edges, remove chips, make gaps, and carry out the most difficult cutting.

Theoretically, a milling cutter can perform the same work as a jigsaw, and even more, but in fact such handling of the tool is fraught with its rapid failure, frequent replacement of the frieze.
Materials for slotted threads
In most cases, plywood is chosen for this type of work - it is uniformly thin, has a pleasant color and structure, and does not lead to further use or storage, unlike solid wood. It is the choice of material that becomes the third pillar of successful work.
The modern market is replete with different types of materials, so it's easy to get confused. For such work, you should choose:
- plywood FK - harmless to humans and the environment, durable, easy to cut, practical;
- FB plywood is also safe for humans, but resistant to aggressive environments, since it undergoes special processing and receives a protective coating, which can cost an order of magnitude more.
Note! In no case do not choose FSF class plywood for interior work - it is treated with carcinogenic preservatives and is only acceptable for use in the fresh air - they are perfectly lined with a bathhouse or a house outside.
Photo of carved wooden houses
For Russia, slotted carving is of particular importance as a decoration for building facades. Since ancient times, ornaments carved on birch bark and other similar materials have been decorating huts, baths, churches, which is colorfully demonstrated by photographs.


Wood milling video with a manual router
If you just decided to try your hand at curly slotted carving, it would be useful to watch a video with a master class. It will help to better understand how drawings are created, and how such house beauty appears.
Interested in wood carving for beginners, as a rule, people who do not have an art education. For them, this art is a hobby. Due to the fact that the knowledge of most of these carvers is scattered, we will try to streamline them. There is nothing difficult in woodcarving itself. In Russia, this type of creativity has always been the main one. Even in the processing of stone, at first they used techniques that had long been accustomed to.
Drawing a pattern on a wooden blank
Today, this art form is of genuine interest, despite the fact that many of the skills are already being lost.
Generally speaking, wood carving can be attributed to plastic art. Traditionally, relief and are distinguished. A novice carver should first master the techniques of creating a relief.
This technique has several thread options:

The list doesn't end there. There is still a lot left behind. From the names you can understand how this or that technique of performance differs. Classification is often complicated by the fact that our country is large. In different regions, the names of the same technique may differ. However, the essence does not change, so we outline the general methods of work.
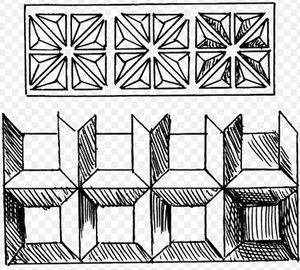
All novice carvers get acquainted with geometric carving. She is simple but beautiful. This type of thread is divided into three types:
- contour;
- trihedral-notched;
- nail or staple.
For execution you will need:
- linden board;
- joint knife;
- Ruler and pencil.
Drawings in the form of a geometric pattern are applied to the board. The carver can come up with his own or copy what he likes. You do not need to immediately take on complex elements if there are no skills and the hand is not strong enough.
 Several ornaments for woodcarving
 The board must be smooth. Such a surface is achieved by planing. Under no circumstances should the surface be sanded with sandpaper. If abrasive particles remain in the fibers, they will not make the thread clean and neat. In addition, the cutting edge of the knife will dull faster.
For beginner carvers, it is recommended to choose hardwood for making geometric ornaments.
They allow you to draw straight lines with a knife. Creating straight lines on softwood boards is much more difficult. So, the tip of the knife cuts into the surface vertically. Depth - 1.5-2 mm. Then the entire line is cut, the knife is pulled towards us. In this case, the blade is tilted at an angle of 40°. Movements should be smooth. Note that you need to start carving the line and finish with the tip of the knife. 
Having made one line or notch, we make the next one. Only now the slope of the blade should be in the opposite direction. The chips will separate, and a geometric recess will appear on the board. If the edges are sharp and the surface is shiny, then everything was done correctly. Gradually cut out the entire element, and then the entire ornament.
Read also
Hand carved wood furniture
It must be remembered that the knife goes easier along the fibers. When cutting through the transverse fibers, more effort has to be applied. The hand can slip, and here you need to know the rules:
- work safety;
- organization of the working space;
- instrument preparation.
Workplace of the cutter
Work with sharp tools should be carried out behind a workbench that meets all the requirements for stability and strength. If it is not possible to make such a workbench, you can limit yourself to a countertop. It can be of any size, but the height should not be higher than the level of the carver's belt.
The countertop should always be smooth and clean. Often during work, the knife slips and hits the table. Chips form and need to be removed. Professionals always monitor the condition of the surface of the workbench. They do not recommend hammering nails, chopping with an axe, or throwing a sharp tool onto a workbench, as these can damage the countertop. The board on which the ornament is cut out is carefully fixed with clamps. Work on your knees, on an unstable table or stool should be excluded.
 An example of an equipped workplace for a cutter
 The woodcarving work table should be well lit. You can install it near the window. However, there is little daylight.
If there is only one light source, dull dark shadows appear that interfere with making the carving clean. Therefore, 2-3 more lamps are installed above the table.
They should illuminate the work from different angles, especially if it is dark outside. Lamps should be installed above the carver's eyes. During work, the eyes are stressed. This is noticed even by experienced craftsmen. A novice carver gets tired faster, and high-quality lighting makes working conditions comfortable and safe.
Tool Requirements
Contemporary open wide opportunities for artists. In wood processing, they are used with success. But we will consider a tool for manual work.
 A selection of chisels for woodcarving
 After all, getting the skill to work with such a tool is more important and more difficult.
In the arsenal of the master is always:
- saw;
- hand drill or brace;
- plane;
- chisels are semicircular and flat;
- knives of different sizes;
- small axe.
Many manufacturers have already taken care of the carvers and create a variety of sets. It is impossible to unequivocally assess their quality and usefulness. There are disputes about this. We only note that not a single professional master has such a set. All tools are purchased separately and finished by hand.