Build your own wooden gate at your dacha. DIY gate: instructions with photos
The existing dacha plot must be surrounded by a fence. In order to enter the territory of a country house, a gate and a gate should be provided in the fence. Gates are usually built for the entry of a car or other equipment. Such gates are quite massive and heavy, and opening and closing them every time you need to enter or exit the site is too inconvenient. It is for the convenience of people's passage that a garden gate is installed.
Construction and design of a garden gate
It is best to install a gate at the same time; the entrance gate can also be located on the same alignment with it.
Types of gates
Before you start building a gate with your own hands, you should decide on its type and what materials will be needed to make the structure. The gate can be made in a rectangular shape, and a small arch is installed on top as a decorative element. 
As a rule, garden gates, depending on the type of material used, are:
- Made of metal;
- Made from corrugated board.
All these materials can be used either separately from each other or combined.
Wooden gate
A garden gate is most often made from a wooden picket fence. Its width rarely exceeds 1.2 m, which is quite enough for a person to easily pass through it.
The design of such a gate consists of the following elements:
- Installation posts;
- Crossbars;
- Struts;
- Bars for strapping;
- Pickets;
- Hinges made of metal or wood.
Installation posts

Log gate posts and wooden gate
usually made of square or rectangular pipes, the dimensions of which must be more than 100 x 100 mm. Metal poles sold in stores already have the required fittings welded on them: hinges, hooks, canopies, and so on. When installing support pillars, their lower part should be treated with a bitumen compound to prevent their destruction from moisture. The poles sold in stores are usually equipped with a plastic protective coating on the bottom.
To make wooden supports, it is necessary to use hard species: larch, oak, chestnut. If you still plan to use pine or spruce for supports, then the posts must be thoroughly treated with an antiseptic and painted, and the painting must be renewed regularly.
Installing brick columns is a more difficult task and requires much more time and effort. To securely fasten the pillars in the ground, provision should be made, the depth of which should be at least 0.5 m.

Option for installing pillars and arches of a brick gate
In relation to the perimeter of the pillar, the foundation should protrude no less than 0.15 m. It is recommended to make the pillar with dimensions of 0.35 x 0.35 m. Concrete pillars do not need to be made with your own hands; it is easier to purchase ready-made ones.
Construction of a wooden gate
To build a wooden gate with your own hands, you will need a simple set of tools:
- Grinder saw or hacksaw;
- Hammer;
- Pliers;
- Level, tape measure and square.
After selecting the material and posts, you can begin installing the gate yourself.
First you need to measure the distance between them, according to which the width of the future gate is determined. For a wooden gate, it is recommended to use wooden posts. The posts prepared for installation are installed in a pre-dug hole, the remaining space in the hole is filled with cement mortar.
Before pouring the solution, you should check the correct installation of the pillars at the level and the accepted span between them.

Installation of gate posts by level
To facilitate control, the columns need to be fastened together at the top and bottom using a crossbar and a strut, which then need to be removed. Next, a wooden structure is assembled from a picket fence. For this purpose, two crossbars are laid on the ground, and a picket fence is installed between them using nails or self-tapping screws. The picket fence elements can be tightly fitted or small equal gaps can be left.
After completing the assembly, it is necessary to attach the hinges to the support post, and the distance from the top of the post should ensure the opening and closing of a wicket or small gate without contact with the ground.
To impart the necessary rigidity to the picket fence structure, a slope should be attached along its diagonal between the crossbars. The picket fence is hung on hinges attached to a post, and a bolt or bolt is screwed onto the second post. To add elegance and aesthetics to the structure, the picket fence in its upper part can be sawed down in such a way as to form a kind of arch.
Wooden gate in the shape of an arch
An arch used as a gate for access to a garden plot, especially one created with your own hands, will allow you to create a magnificent composition from natural materials and make guests marvel at the impeccable taste and feeling of the wonderful owner of the dacha.
The arch itself and its frame are made of the following materials:
- Bars 100 x 100 mm for the construction of supports and walls;
- Boards for installing a small roof;
- Four three-meter slats to fill the space between the walls.
A wooden arch is made from carefully dried wooden material so that deformations do not appear later.
To create a bend in an arched structure, first create a template on cardboard or wooden material. To do this, first the arch itself is drawn on cardboard - the upper element of the structure. Then you need to attach the bars and connect them to the finished wooden template.

An example of a wooden arch for a gate
Then an arch is cut out along the contour of the template with a saw or jigsaw. The procedure is repeated for the other half of the structure. Next, a base of bars is secured to the arch with self-tapping screws and wooden slats are nailed with small nails.
Then you need to make a side panel, which is constructed from the same slats that fill the space. It is best to make the side walls lattice. The gate arch is ready, all that remains is to install it in the required place and decorate it to your liking with decorative elements, flowers or plants.
Metal gate
A metal gate can be installed when a gate is being built either as part of it or a little further away. But it can also be arranged separately, when the gate is placed on a completely different side.
A metal gate can be made of two types:

To build any type of metal gate, you will need the following materials and equipment:
- A hacksaw for metal or a grinder saw;
- Welder;
- Metal profile 20 x 40 mm or chain-link mesh with dimensions 60 x 60 mm.
As you know, almost every summer cottage has fences (fence, wall around) that are simply necessary for safe and comfortable living. Each of the fences (depending on needs) must have an entrance in the form of a gate or an entrance, to ensure which a variety of gates are installed.
Gates for a dacha, unlike a regular door entrance, can vary in:
- Material of manufacture.
Usually metals or wood are used to make them.
Metal gates
- Overall dimensions.
To clearly understand the principles of gate installation, you need to decide on their type. According to the standard, gates are made in size 2 m 60 cm. If necessary, the width of the entrance can be increased to 3 m 50 cm.
- Opening method:
- Hinged (open like shutters in a house).
- Sliding - do not require space (they slide to the side along the fence). An ideal solution if the dacha plot is small.
- Lifting - entry is carried out by manually or mechanically lifting the gate up.
- Gates for a summer residence with a wicket (have an additional doorway).


Each type has some features, for example, lifting and sliding gates do not require much space to open (this is very convenient in winter, when snow can interfere with the normal movement of the gate). In this regard, swing gates are quite impractical.
This type is very easy to install. Of course, like any gate, it has some disadvantages, for example, when used in winter, you will have to throw away snow before opening. On the other hand, if you are planning to install the gate yourself, this is the best option.
This is the most ancient type of gate and has not changed at all since then. This design is used everywhere, especially in the private sector. Its advantage over other types is the absence of a foundation required for the construction of sliding gates and load-bearing beams used in the lifting version.
The swing version consists of two iron or wooden doors, of arbitrary dimensions, suspended on poles or a brick support, with regular large hinges. They open, depending on the design of the hinges, inward or outward. But most often, there are options with swinging in both directions (outward and inward).
As mentioned above, the choice of material is small (wood, metal) and depends on the owner or customer. For example, from metals, steel or corrugated sheets are most often purchased. Wooden doors can be made of any species, but larch is best, because it is least susceptible to rotting.
Hinged doors are available in two versions:
- Blind - the opening is completely closed.
Continuous lining (with the selected material) is carried out after the frame is completed. For example, they are stitched with galvanized iron or corrugated sheets of at least 0.7 mm.

- Transparent - the stitching is not continuous.
A frame with stiffeners is made from round or profile rectangular pipes. The stitching is carried out according to the design solution previously approved by the customer. It can be in the form of a picture or simply made in the form of verticals.
Installation, for example, of the metal version is quite simple and includes several sequential operations:
- First you need to prepare the frame (frame). It should include two vertical and three horizontal profiles.
To do this, rolled metal (pipes, profiles, angles) are cut (according to a prepared drawing) with a grinder. The dimensions of the rental depend on the dimensions of the gate. For example, when assembling a 3x2 m frame, corners or a profile 40x40-60x60 mm are suitable
- Then the profiles are connected using a welding machine or bolts.
The profiles must be securely fixed to avoid frame defects; for greater strength, iron triangles that are welded in the corners or braces (metal beams) that are welded diagonally to the gate can be used.

- The final stage is sheathing.
Connections are made using welding, screws or bolts. For convenience, sheathe in one direction, for example, to the right if you are right-handed, and in the opposite direction if you are left-handed. If you used corrugated sheeting, screw the screws into the recesses.
After all the work is completed, the hinges are welded. All weld joints are cleaned and painted.
Drawing of swing metal gatesThe wooden gate frame is simply assembled using nails or screws. Cover it with whatever you like, and screw the hinges in at the end. Braces are also required in this case.
Support pillars can be mounted from bricks, logs or pipes (metal). Post holes are dug approximately 1.8 m deep and 30-50 cm wide. They are filled with 20-30 cm of sand and crushed stone
Pillars made of logs or pipes are inserted into the hole, fixed and filled with concrete so that the solution is level with the ground.
The main criterion that must be adhered to is to concrete the supports at a depth of at least 100 cm (this is the amount of soil freezing; overcoming this threshold, you guarantee the necessary strength and durability of the future gate.
Preparing cement mortar will not be difficult (mix 2 buckets of sand, 3 buckets of crushed stone, and 10 kg of cement, adding water until the required consistency is achieved).
Sliding gates are installed if you are not satisfied with conventional swing gates, or to save space. After all, they resemble a coupe (its doors). Rolling along a wall, fence, room, hangar, they practically do not go beyond its dimensions.
Such gates are a very popular, but expensive pleasure. If we compare them with other systems, installing sliding gates with your own hands always requires certain skills and some training. The person who carries out the installation must have relevant experience.
Sliding gatesThe general frame of such gates is also made from profiles and is distinguished by the presence of a guide welded to the lower profile. The guide is needed to move along the rollers, which are welded to the channel and pillars (rollers are welded to the pillars to support the gate).
In addition, special catching elements are also attached to the pillars, which are necessary to reduce the force of collision when opening and closing the gate.
Sliding gate diagramThey can be opened (rolled back) by hand, but if you want to automate the gate, then use an electric motor to control it. Additionally, install a movement mechanism (rack with teeth or chain drive).
Installation of rollback systems cannot be completed without purchasing a ready-made installation package, including:
- load-bearing beam (U-shaped);
- plugs;
- 2 main videos;
- end roller;
- trolleys;
- catchers;
- limiters.
You can purchase large, medium or small packages yourself to install sliding gates.
Sets of components (installation packages) are selected based on the weight and dimensions of the cantilever-type structure.
 Installation package and location of components
 Two roller supports are mounted on a previously prepared channel blank. The U-shaped carrier is welded (screwed) to the bottom of the frame so that there are roller carts inside it. This will ensure long-term operation and minimal contamination of the mechanism.
Roller supports are secured to the foundation with bolts or plates. This will allow them to move freely while supporting the weight of the gate
Do-it-yourself installation of sliding gates is done as follows:
- We dig a trench 1.7-3 m deep and 40–50 cm wide under the foundation. The length of our concrete foundation should be 1/2 the width of the passage.
- Next we make a frame from reinforcement. We take reinforcement with caliber d12, channel No. 18 and weld the parts. The length of the channel is also equal to 1/2 the width of the opening. Reinforcement bars must lie below the soil freezing level.
- We fill the bottom of the trench for the base of the gate with sand and compact it.
- Next, we lower the welded frame into the ditch and set the horizontal position to a building level. Using two bars located at the ends of the channel, we check its parallelism to the rollback line.
- After this, we fill our trench with concrete mixture at the rate of:
- cement - 5 bags;
- crushed stone - 0.3 cubic meters;
- sand - 0.5 cubic meters.
 Installation of sliding gates
 After 5–7 days the base will set completely and become strong.
If you want to control the gate using automation, you must carefully lay the cables in plastic (possibly from the sewer) or metal tubes.
After 5-10 days have passed after the foundation has been completed, they begin installing the rollback system. The instructions suggest dividing the assembly process into stages:
- Preparatory.
- along the opening at a height of 20 cm from the road we stretch a string to set the position of the carrier.
- We insert the roller supports (checking the instructions) into the beam and move them (simply roll them) to the center of the gate.
- We insert roller trolleys into the U-shaped carrier and secure it to the sash.
- We place the assembled structure on a channel blank.
- We place both roller supports according to the markings.
- We align the gate so that it is parallel to our cord in the opening.
- we strengthen the roller carts onto the laid channel.
- We weld an adjustment pad to the channel for the second roller support.
- We roll the structure to the end to check the horizontal position of the supports and the sash.
- then we just weld the platform (adjustment) of the first support.
- then we remove everything and weld the platforms of the remaining supports to the embedded channel.
- Again we strengthen all the supports and close the gate leaf.
- we close the gate to precisely regulate the horizontal position of the load-bearing element. This is done with a wrench by simply raising/lowering the roller platforms.
- Freewheel installation
Adjustment is achieved by correct arrangement of the roller carts.
 Freewheel installation
 Take the appropriate wrench and loosen the nuts securing the adjusting pads and roller supports. We close/open the gate several times to install the roller supports in the desired position. When easy and free movement is achieved, only the nuts at the top need to be tightened.
Next, install the plugs and the roller at the end. It is mounted on the front side of the gate in the U-shaped guide itself. We secure it with bolts and proceed to install the plug, which is supplied in the installation package of the sliding mechanism. It is strengthened from the back. The plug is provided to protect the rollers from rust and jamming due to bad weather.
Then we mount the upper bracket. First, loosen its rollers a little and place this element so that the rollers are flush with the top edge, and the bracket itself is turned towards the support post at the fastening point. Then we press the part and fix it.
 Ready sliding gates
 - After this, we begin trimming the gate. We cut the sheets of prepared material:
- iron;
- steel;
- stainless steel;
- corrugated sheeting;
- other.
sheathing begins from the front of the gate, securing the material with screws, rivets, and iron strips.
After this, we install the upper and lower catchers to relieve the load on the mechanism and prevent the gate from swinging.
Lifting gates for a summer residence save a sufficient amount of space, but their installation cannot be done without the help of specialists. The gate has an electric mechanism for lifting and devices with which it is carried out (ropes, slats, gears).
Such gates are difficult to open by hand due to their heavy weight. Therefore, they are not suitable for summer cottages that do not have electricity, as they require a constant power supply.
There are three types of such gates:
- Louvre type.
- Lifting rotary.
- Rising vertically.
The easiest to manufacture is the third option. It represents two pillars with guides along which gates with rollers slide. If you use an electric motor with a rack and pinion mechanism, installing it vertically, you can automate the process.

One of the options for overhead gates.
It is difficult to make blinds yourself, so you need to buy them. This is the most expensive of all options. Instructions for self-installation are provided in the video. Therefore, you can try installing them yourself.
In principle, any of the gates, except louvered ones, can be made with a wicket; you only need the wicket itself and several additional profiles.
There are two types of gate installation:

The gate on the sash is done like this:
First, we choose which half of the gate will have a gate, then we mount 4 profiles (vertically). Two profiles will mark the limits of the frame (those that are further from the gate are external) and two in the future will form an opening for the gate (internal).
 Separate gate
 To increase strength, braces are welded (in the corners, to the external posts). In addition, a middle profile (horizontally) is mounted, defining the internal opening of the gate. Afterwards, the profiles are drawn taking into account the additional 2 cm of the opening diagonally. 2 cm is the accepted tolerance for possible metal expansion or deformation. Finishing work is carried out similarly with swing gates.
It is completely logical that the gates are installed after construction and require the preliminary installation of support pillars.
Preparation
Before starting work, to perform it efficiently, we will need the appropriate tool, namely:
- welding machine (for fastening profiles, the power of the device must be at least 1000A);
- grinder (for cutting workpieces and general metal processing);
- dye;
- hammer;
- building level;
- roulette.
 Tools are your faithful assistants
 In addition to the tools, you need to prepare the starting material - profile pipes (the ideal option is a pipe with dimensions 60x40x2.5). The amount of required material, including metal, is calculated in estimates or found out when drawing up drawings or diagrams.
When constructing sliding gates for a summer residence, for their further normal operation you additionally need:
- rollers (including end rollers);
- beams;
- catching mechanisms.
 Mounting package for assembly
 All these elements form a console, without which it is simply impossible to make sliding gates.
Before installing a garden gate, you need to decide on the dimensions (standard parameters - length, width, height). If the gate is used for the passage of vehicles, then 2.6 m will be quite enough for a regular passenger car (for a truck - 3.5 m). Remember, if you have swing gates, increasing their size will increase the space required to open and close them.
After preparing all the materials and tools, they begin to pour the foundation.
Foundation
When installing sliding gates for a summer cottage, it is also necessary to organize the foundation. We will dig a trench in advance (about 1.5 meters deep and 40 cm wide). We will place a channel there with welded pieces of reinforcement and fill it with concrete level with the ground, as indicated in the paragraph on sliding gates.
The channel is installed using a building level to avoid distortions. It takes 7 days for the concrete to harden so that work can continue.
Foundation diagram for sliding gatesHow to make a frame
From the very beginning, using any available tools (grinders, metal brushes), clean the pipes, and then paint them. For the manufacture of frames of various types of gates, including sliding ones, pipes of different sections (60x40 or 50x50) are used. The outer frame is made from pipes, and then the inner frame is welded into it. Next, the structure is sheathed with wood, metal or corrugated board.
If you are installing sliding gates for your dacha with your own hands, you will also need to align the rollers on the channel, then put the guide on top (set it level) and weld special carts with the rollers to the channel itself. Then the support rollers, which were mentioned earlier, are welded, and the final stage is to paint the entire frame to give it anti-corrosion properties and an aesthetic design.
The gate is usually made of the same material as the fence. Depending on the needs of the owner, the wooden gate is varnished or painted.
The most common option is to make a gate from a picket fence
Picket fence gateFor normal use of the structure, determine in advance the distance between the gate supports; this will determine the size of the door itself and the width of the passage. Support posts can be made of concrete, brick, metal or wood. After concreting the supports and drying the solution, hinges are attached to the supports and the door is hung so that there is a gap of 5-10 mm at the bottom. Try the gate on the supports before they are concreted, measure the distance required for normal opening/closing, and only then install
Photo of the gate at the dacha


Reading time ≈ 3 minutes
A wooden gate allows you to make the entrance to the yard neat and additionally protect your private territory from the entry of strangers. A durable structure is easiest to make from boards and timber. Additionally, the work will require small metal corners and bolts.
Tools
- Level;
- Drill with bits;
- Roulette;
- Square;
- Construction pencil;
- Ratchet with socket head.
Materials


- Wooden blocks;
- Metal corners;
- Loops;
- Bolts;
- Self-tapping screws.
Preparatory work
The gate is made from wooden boards, the frame is assembled from timber. The frame will be hung on beam supports, which the contractor must install in advance into the ground using metal support wedges.

They should be located at such a distance that the owner does not have to cut the boards for the gate.

Therefore, you first need to measure the passage and calculate how many boards for the door will be required.

Supports are installed into the ground at a specified distance.
Main assembly steps
First of all, you need to prepare a frame that will be the basis for the gate. Its height should be 5-10 cm less than the height of the boards. This will allow them to be securely fixed without compromising the appearance of the structure.

Assembly is carried out using narrow metal corners and hardware.

You should select bolts that are much smaller in diameter than the width of the timber used to assemble the frame.


Otherwise, there is a high risk of damage to the material. In the center of the assembled rectangle, a transverse beam is additionally attached. It will strengthen the structure and correctly distribute the load.
1. The prepared frame is tried on the previously dug supports.

2. The frame is firmly installed in the opening (supports are used as in the photo).


3. Hinges are attached to the support beams (the bolts must not be tightened completely), after first leveling the entire structure.


4. The fasteners are adjustable and tightened until they stop.


5. Previously prepared boards are screwed to the frame using self-tapping screws. They need to be placed close to each other, avoiding the appearance of unsightly gaps.

These steps will allow you to make a wooden gate, which the owner can later paint. It is advisable to impregnate the materials with an antiseptic before using boards and beams. This will protect the wood from getting wet or drying out. Additionally, the composition will help prevent damage to wood by insect pests and prevent the formation of fungus on the fibers.
Making the top strip and installing the latch
To make a mounted wooden gate look really attractive, it is recommended to make the upper frame of the opening. For ease of use, the bar should be placed not at the level of the top of the boards, but slightly higher. To do this, you can place a small piece of board or timber between the top of the support and the bar itself. It is better to nail together elements with long nails (4-5 pieces). This will allow the addition to be securely fixed.

An equally important element of a wooden gate will be a small door lock. It must be placed on the outermost board of the gate (on the opening side). You can use small metal fittings: they will complement the design well and help close the door tightly.

All of the above recommendations and advice will help every owner of a private house or cottage to complement a previously installed fence with a neat wooden gate. Before starting work, it is recommended to study the attached photographs and training videos. The work will take 3-4 hours. A simple diagram of connecting the elements will allow any owner to carry out such arrangement of his own yard.
DIY video of installing a wooden gate
Making a wooden gate with your own hands has many advantages. First of all, wood is an environmentally friendly material that has high strength, attractive appearance and good performance characteristics. Let's look at how to make a wooden gate below.
Advantages and disadvantages of constructing a wooden gate
Wood is a fairly popular and affordable material for construction. Among its advantages are:
- affordable cost, which is several times lower than iron or other alternative options;
- ease of processing, construction of a gate requires a minimum set of tools and a little experience working with them;
- high speed in the manufacture of wickets.

Among the disadvantages of using wood in the manufacture of wooden gates, we note:
- short service life of the product, since wood is exposed to moisture, ultraviolet radiation and other factors;
- high level of fire safety;
- ease of hacking.
Selection of materials and tools for a wooden gate
Since the gate is located outside the room and is exposed to various kinds of external stimuli, the choice of materials for its construction should be approached with particular seriousness. Among the wide variety of wood, we highlight several options that are ideal for these purposes:
- making a gate from larch is the most practical option, since this type of wood is comparable in strength to oak, although the cost of larch is slightly lower;
- the choice of pine or spruce is cheap and easy to process; in addition, due to the fact that the materials contain a large amount of resins, they are well resistant to moisture, biological pests and mold;
- cedar - has good performance characteristics and an attractive appearance, but is quite expensive;
- The most suitable and durable material is the use of oak, it has sufficient hardness, can be sanded and polished well, in addition, the texture of the wood is perfectly visible on such a gate.

Using laminated timber from larch is a practical option, but it is better not to use laminated timber from other types of wood when making gates.
Please note that purchased materials must be pre-chilled and have the same thickness and optimal moisture content.
After preparing the materials, you should start selecting tools that will help you complete the work of constructing the gate. We suggest that you familiarize yourself with the minimum set of tools that you will need during the work:
- the presence of an electric or hand drill is mandatory, because it is used to drill holes for installing fasteners;
- using an electric jigsaw or hacksaw will help separate the material into parts;
- It wouldn’t hurt to have a chisel, hammer, hand or electric plane;
- In addition, you will need a screwdriver or screwdriver;
- To check the evenness of the connection, a water level is required;
- Also, you need to prepare rope, brushes, carpenter's pencils, squares and a router.

Materials based on coniferous wood are affordable and quite durable. But, at the same time, needles are distinguished by the presence of resin passages and pockets, which impair its strength. Such boards are unsuitable for work. But still, if, when purchasing the material, resin was found on one of the boards, then to eliminate it you will need one of the solvents presented below, in the form:
- gasoline;
- acetone;
- potash;
- caustic soda;
- ethyl alcohol, etc.
The solvent is applied to the surface of the wood on which the resin is found and washed off with water. If the resin cannot be washed off, then the boards are not used for work.
Particular attention should be paid to checking tools such as square and level. They must show only the correct values. When marking, you should leave a few centimeters in reserve. In order to avoid corrosion on the surface of the gate, you should choose fasteners that are coated with zinc.

Wooden gate: main types
Before making a wooden gate, you should determine its design, on which the appearance and presentability of the entire building depends.
There are different types of gates:
- lattice type;
- deaf type;
- with a strut;
- without strut;
- made of wood;
- combined.
To make a simple lattice gate, you will need a regular picket fence, the width of which is 10 cm. To fix it, you will need screws or nails. This procedure helps prevent the gate from sagging.
To ensure the strength of the gate, due attention should be paid to its drawing. It is possible to create them yourself. Although almost any drawing of a gate is available on the Internet.
Choosing a lattice gate will allow you to enjoy free communication with neighbors, as it practically does not block access to the house. These gates have a second name - through. They are lightweight, practical and durable.
The layout of this gate is based on installing the gate using two supports in the form of pillars. They are dug into the ground to a depth of 40 to 100 cm. It is preferable to dig a hole that will be located below the freezing depth of the soil to eliminate the risk of soil heaving and deformation of gates and gates.
The frame of the gate contains upper and lower crossbars, which are connected to the supporting section by strapping and cover slats. In order for the gate to obtain the necessary rigidity, a strut is required. The support post secures the frame with hinges, and to prevent the gate from opening in strong winds, there is a latch on it.

The second option, arranging a blind gate, is distinguished by the ability not to show your yard to neighbors and all people passing by. To make such a gate, you will need a solid piece of wood, which is reinforced with slats and installed on two support posts.
In addition, some home owners prefer combined gates, for example, made of wood and glass, wood and metal, wood and polycarbonate. These materials complement the wood and make the gate even more presentable.
How to make a lattice gate
There are two options for installing this type of gate frame:
- thorny;
- metal-toothed.
The first option is more convenient and practical, as it is characterized by high strength and the presence of a closed connection. But, at the same time, it requires certain skills in working with carpentry tools. Since the tenons and grooves must be connected with a slight stretch.
To glue wooden parts, PVA glue intended for woodworking is used. After the frame is manufactured, it will be checked for compliance with the geometric shape and evenness. All corner sections must be straight. After using the glue, screws are used for additional fixation of all elements.
To check the frame, also measure it diagonally. The two diagonals must be absolutely even.
The dimensions of the gate depend directly on the size of the opening in which it will be installed.
The second connection option using metal plates involves fixing them on wooden slats. This type of connection does not require much experience and is carried out very quickly. A gate constructed in this way is practically not inferior to a grooved one in strength and reliability. However, the appearance of the structure becomes less presentable.
To improve the service life of a wooden gate, combined metal parts are added to it. This type of gate is more durable and resistant to mechanical stress. After the end of the life of the tree, you just need to change the sheathing.

Installing a wooden gate involves performing the following actions:
- marking the installation location of the supporting parts on which the gate is fixed;
- installation of a picket fence on the finished base of the gate;
- during the installation of the picket fence, all right angles must be maintained;
- a special gasket is installed in the space between the false slats and pillars, its thickness is about 7 mm;
- after installing the gate in the pit, it is leveled;
- To strengthen the gate, slopes are used, then crushed stone and sand cushions are installed and further concreting is carried out.

Wicket design and characteristics
It is possible to make a gate of complex shape, in the form of an arch or an asymmetrical figure. The main thing in this matter is a correctly selected and drawn up drawing. To manufacture complex curved parts, it is better to contact a craftsman who has some experience in this matter.
Do it yourself, preferably just assemble and paint the gate. All connections must be strong and level. Next, the finished product is primed and painted with varnish or paint.
Before applying paint, the gate is sanded, which improves the presentability of its appearance.
We invite you to familiarize yourself with the materials in the form of fittings that will be required when making a gate with your own hands. Among them are:
- automatic pattern latch;
- overhead loops;
- valves;
- cap heads;
- manual latches;
- latches;
- locks;
- double-sided loops.
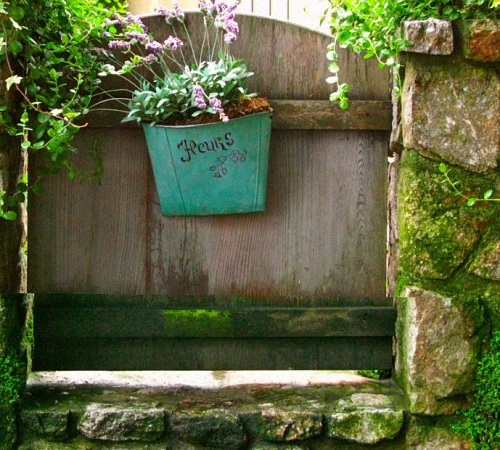
Wooden gate photo:

In order to extend the service life of a wooden gate, it should be treated with an antiseptic, primer and moisture-proofing agents. After the gate has dried, it is painted or varnished. When choosing paint, focus on materials designed for outdoor use.
There are a huge number of paints that are suitable for these purposes. The dyeing technology is quite simple. To do this, use a medium-sized brush. First, apply an antiseptic, then primer, and only after drying, paint.
When choosing a primer, it is better to give preference to universal compositions intended for application to both wooden and metal surfaces. Among them are:
- materials for opaque coatings;
- glypthal type primers;
- pentaglyphthalic compounds.
Please note that the primer must interact well with the paint. After applying the primer and drying, the surface is painted with the first layer of paint. Next, the gate is sanded, painted again and sanded again. The final coat of paint is not sanded.
If you plan to apply varnish to the surface of the gate, you should adhere to the following technology:
- sanding is done before applying varnish;
- after sanding, the surface is moistened with water to raise the remaining pile;
- the wood is dried;
- another sanding and varnishing is carried out in several layers;
- if the gate has a presentable appearance, then it is ready for use;
- otherwise, the sanding and varnishing procedure is repeated.
Among varnishes, it is best to focus on yacht types. Although they are more expensive, their service life is equal to the service life of the gate itself. This material perfectly tolerates moisture, ultraviolet radiation, frost, heat, etc.
Tip: When choosing all the materials used to process a gate made of wood, you should first study the compatibility table of paints and varnishes in order to avoid mistakes when choosing the wrong type of paint or varnish.
DIY gate manufacturing technology
We suggest you familiarize yourself with the main stages of working on a wooden gate:
1. Installation of wooden support posts.
Before starting work, two holes are drilled, the depth of which is about 1-1.5 m. Each hole is filled with sand and watered. Next, a crushed stone cushion is installed on which the pillar is located. The structure is leveled and filled with concrete. It is recommended to treat the surface of the post with an antiseptic and water-repellent impregnation. In addition, a waterproofing film is installed in the pit to prevent the wood from rotting.
2. Construction of a wooden frame.
Slats are installed on the Z-shaped structure, which will create a strong base for the gate. The bars are laid out on a flat surface, cut to the required length and mounted on the frame. To get rid of small irregularities, it is recommended to use a plane.

3. Work on the sheathing.
Depending on what type of structure was chosen for the gate, it is covered. When constructing a solid gate, no gaps are left between the boards and slats. In the process of manufacturing a lattice-type gate, each board is cut separately in relation to the required length.
4. Installation of fittings.
The manufacture of the gate is completed by the installation of fittings in the form of awnings, door latch and hinges. After completing this procedure, the gate is checked for functionality and prepared for painting or opening with varnish.
How to make a gate video:
In most cases, the construction of infrastructure facilities on a summer cottage does not require the qualified intervention of builders. Since erecting a fence and organizing an entrance are the primary tasks when arranging any home, it is most advisable to understand the issues of what types of entrance structures exist and which materials are most rational to use when installing them, as well as how to make a gate in a dacha.
To successfully make any type of gate structure with your own hands, you need three main components - facing material, tools and time. Each garden plot and internal area is characterized by the use of a certain type of gate, since each of them has its own opening and installation technology, drawings, recommended finishing, as well as consumables. To determine the optimal one, it is necessary to identify the properties, advantages and disadvantages of the most used types of gates.

The principle of operation of swing gates is determined by their structure, which includes two leaves that swing open in directions opposite to each other. The construction of such gates will help to save a lot of time when organizing entry and exit.
The main advantages are:
- ease of installation;
- reliability;
- durability.

Flaws:
- the presence of a cleared space for opening the gate leaves, which must be maintained in proper condition during the winter period;
- in the case of using the gate in automatic mode, you will need to purchase two sets of motors for each of the leaves, which will significantly affect the total cost.

Having an undeniable advantage over the previous type, sliding gates are a structure consisting of one leaf, moving parallel to the equipped support pillars, along the fence line, in a certain direction.
This category of gates, in turn, is divided into three subgroups, which are suspended, cantilever and rail, therefore, when purchasing one or another set of such gates, it is necessary to understand the specifics of construction and the features of further operation. Thus, the suspended type involves the manufacture of a special hinged safety beam, which is the basis for fastening and subsequent movement of the sashes.

The cantilever type involves the installation of cantilever mechanisms and a channel beam, as well as the presence of several additional meters for optimal rollback of the gate, and the rail version is characterized by the placement of a guide rail at the bottom of the structure.

The advantages of such gates are:
- compactness and no need to prepare a cleared space for opening the doors;
- possibility of using automation;
- practicality;
- moderate pricing policy;
- organization of a wide passage, as well as the convenience of remote control of the gate).
Flaws:
- constant monitoring of the cleanliness and availability of lubrication of roller mechanisms;
- carrying out a number of preparatory procedures (calculating the distance for rolling back the doors and having a perfectly level fence);
- basic construction skills and knowledge of installation features.
Any owner of a country home can cope with the construction of such a structure by following the step-by-step instructions of the craftsmen, however, due to the high cost of component materials and devices, as well as the high chance of making mistakes in the calculations or assembly of the structure, it is more advisable to seek help from specialists. In this case, you can count on a free specialist visit and warranty service for the agreed period.

Being a type of sliding structures, sliding gates consist of two doors that slide apart in two opposite directions. Based on the technology of movement, sliding gates are also divided into component groups, just like the type of gate described above. The defining advantage of such an opening mechanism is the reduction in the overall weight of the gate by distributing the load across two frames, but this advantage is achieved by using two sets of motors, which significantly increases the final cost.

Among the huge variety of materials presented in the assortments of construction stores, the materials that have become most widespread when arranging entrance gates include metal and wood. In this matter, the choice of one or another raw material mainly depends on the financial capabilities of the owner.

Of course, preference in this category of materials is given to corrugated sheets, since it has a number of important distinctive advantages, however, like every raw material, it has some disadvantages.
The advantages of this material are:
- strength due to the rigidity of the base;
- moderate cost;
- ease of installation;
- resistance to harmful environmental influences;
- wide choice of colors;
- duration of operation.
Flaws:
- if the protective shell of the sheet is slightly damaged, corrosion may occur;
- noise when exposed to precipitation.

In the presented category of materials, we can also highlight such a representative as chain-link mesh. Gates of this type have a high light transmission capacity, have low windage and are light in weight. In addition, the mesh is fastened in a short time and without exhausting effort.

Nowadays, wood-based gates are a rare occurrence. This circumstance is due to the endless desire for safety and durability, which are easily achieved by using metal products. Making the frame for the doors and cladding from wood over time leads to sagging of the gate and deformation of the entire structure due to its bulkiness and high specific weight. Of course, the use of wood as a basis for gates, the construction of country houses and site decorations highlights the natural component of the appearance and allows you to feel unity with nature, however, it requires special processing of each element and subsequent regular seasonal repairs.
Among the advantages of such raw materials are:
- low cost;
- availability of material;
- a minimum number of tools and consumables, which significantly saves the budget;
- pleasant aesthetics;
- quick installation;
- ease of processing.

However, the pleasant positive characteristics are largely offset by the negative properties of such a material. The main ones:
- short period of operation;
- low strength;
- exposure to negative environmental factors;
- fear of sudden changes in temperature and increased moisture content;
- tendency to ignite.
If, nevertheless, you are determined to use wood for cladding the “calling card” of your personal plot, then it is most advisable to carry out this process on a metal frame made of a profile pipe or any other metal support floors.

The main purpose of the support base is to securely fix all the components of the gate. As a rule, the foundation is represented by a reinforced rectangular concrete block placed along the perimeter of the proposed installation of the structure being built. In our case, concrete pouring is carried out away from the driveway, in the internal area of the house. When manufacturing swing gates, the foundation should be located in the direction of opening of the leaves to reduce the load on the hinges when open.
The issue of high-quality pouring of a concrete base when making metal gates is especially acute, since it ensures uniform distribution of the pressure of metal products on the soil, protecting the entire structure from shrinkage and distortions.

When starting to carry out work on arranging this element, you should clearly understand that the quality of the foundation will be the same as the functioning of the gate. When constructing massive objects, it is most rational to prepare deep foundations, for small structures - lightweight supports.
A useful activity preceding the procedure for pouring a reliable foundation is taking samples and conducting a soil analysis along the perimeter of the future installation sites. Knowing all the characteristics of the soil will subsequently ensure the stability of the gate and determine the optimal type of foundation.
Based on the above recommendations, each owner of a suburban area will be able to easily select the most suitable gate manufacturing option for him and implement it in the shortest possible time. Any work performed by oneself allows not only to significantly reduce the costs of constructing a particular object, but also to clearly understand the structure of each connecting component, which will subsequently significantly simplify possible maintenance and repair processes.
Video
You can learn about the manufacture of different types of gates by watching the videos we offer:
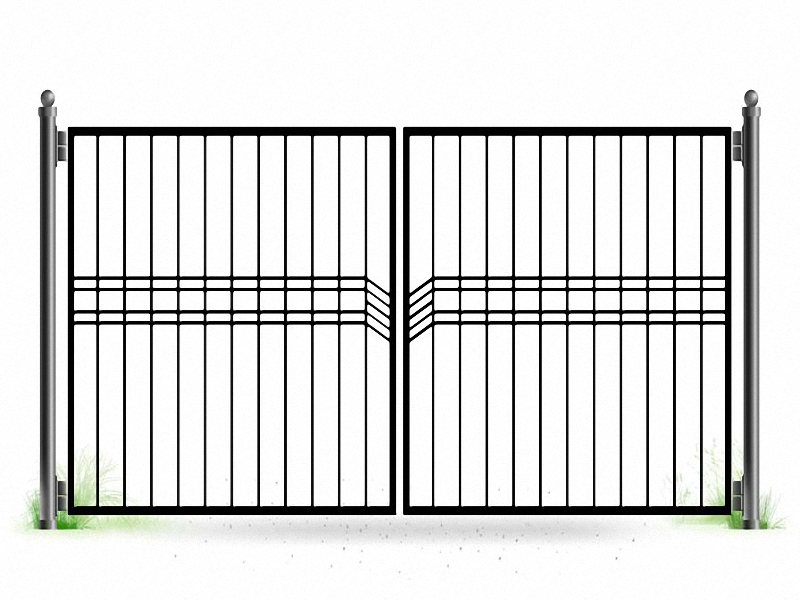
Schemes and drawings
The operating mechanism of swing gates is quite simple, but automated sliding gates are more complex to manufacture. We hope the drawings and diagrams we offer will help you understand this issue:


