How to properly remove door handles of different types, features of dismantling knobsets. Disassembling an interior door handle How to remove a door handle
Have you ever wondered how many times a day you open and close the interior door in your apartment? Most likely no. Moreover, all our actions are performed here so mechanically that we do not pay any attention to such elements as ordinary door handles. Until something happens to them. As soon as some kind of breakdown occurs, we not only begin to pay attention to the fittings, but also understand how important the role they play in our home.
Unfortunately, no matter how high-quality and expensive door hardware is, it needs to be replaced from time to time. The reason for this can be either unexpected breakdowns or the usual desire to slightly update the door design. For dismantling work to be successful, it is important to know the basic rules for disassembling door handles, of which there are several types today.
How to easily remove and disassemble an interior door handle
A broken door handle and the desire to replace it with a new one are the most common reasons that force us to pick up a screwdriver and get to work. But before you do this, you need to carefully study the mechanism of this hardware.
Classification of door handles
All door handles that are installed in an interior door can be divided into three main types:
- Stationary.
- Push.
- Knob handles.
Stationary are the simplest options for door handles. There are no built-in locks here, other than small latches or pinch rollers. To open the door with this handle, you just need to lightly pull it. They can have different shapes: U-shaped, round, etc.
How to remove a stationary handle from a door surface
Such handles practically do not break, so they are most often removed in order to replace them with new, more modern models.
If the fittings are held on by regular screws, you can disassemble them using a simple screwdriver.
If no screws are visible, most likely the common rod serves as the base here. To remove such a handle, you need to hold one part of it with your hand and rotate the other counterclockwise.
If the handle has mechanical latches, it will take a little more effort to remove it. First, use a screwdriver to remove the screws, after which the upper decorative trim, which is located around the handle, is removed. Here, as a rule, there is a latch (tongue) and a tetrahedral rod. Once the top coating has been removed, you can lightly remove the rods and remove the handles.
Disassembling the push handle on an interior door
The most popular option for door fittings, which is used in houses and apartments. The mechanism consists of two L-shaped parts; they are also connected using a special rod. When you press the handle, the latch is hidden, thereby allowing you to open the door. A simple but fairly reliable option.
It will take a little more time to disassemble the push handle than with a stationary one.
The first thing we do here is remove the screws that hold the trim. Next the pallet is removed. Next, you need to carefully examine the tetrahedral rod. There are models in which the fittings are equipped with an additional fixing rod with a cap. In this case, the rod can be removed quite easily, and the fittings can simply be carefully unscrewed. The other part of the handle is removed along with the axial rod. Before doing this, do not forget to remove the cover.

An easy way to remove and disassemble the knob handle
Such handles are often installed in hotels, because in addition to their functionality, they also attract users with their attractive appearance. Translated from English, “knob” means handle, button. Its shape is round. It is very convenient to use, as it allows you to lock it with a key from the inside of the room. The only disadvantage of this fitting is that it breaks quite often, as a result of which you have to constantly disassemble it.
Before removing this mechanism, it must be thoroughly inspected. Here, as a rule, there is a locking pin on the side of the room, which allows you to secure the handle to the canvas. To make the fittings easier to use, the pin is specially equipped with a small spring.
To remove the handle, you need to take a sharp, thin object (a screwdriver works well) and gently press it onto the pin. It happens that the handles have decorative overlays, then upon first inspection you will not be able to see the pin. To access it, you need to remove all unnecessary pads. Most often they are attached using ordinary screws that can be easily unscrewed. In some models, you can remove these decorative elements simply by prying them off with a screwdriver.

Disassembling the knob handle
After the above steps have been completed, you can begin to disassemble the pen. This is done at the end of the door. Here you can immediately see the bar from which the latch comes out. There are two small screws at the top and bottom of this bar that can be removed using a regular Phillips screwdriver. There are some models where screws are installed with a regular straight cut, then you need to use the appropriate tool.
Once you have removed all the screws, you need to pry up the bar and carefully push out the inside of the latch. This concludes the analysis of the knob handle.
All work must be performed extremely carefully so as not to damage the surfaces of the doors, as well as to maintain the integrity of the handle itself (if you do not remove it to replace it with a new one). Removing and disassembling the door handle on an interior door is not at all difficult, the main thing is to follow all the recommendations and perform the necessary actions one by one.
The problem is quite pressing, considering how many times a particular door has to be opened/closed every day. The result is wear and tear of the fittings. Therefore, a good owner should understand how to disassemble the door handle of an interior door. This is not difficult to do if you familiarize yourself with its typical models and their features.
Types of products and dismantling procedures
Stationary version
The simplest option for an interior handle. Fittings of this type have practically fallen out of use: at least, they are no longer used in residential premises. It is a bracket with fastening elements. The only difference is that it can be one-way or end-to-end. In the latter case, 2 handles are fixed on long screws (or axles), installed on both sides of the sash, opposite each other.

The answer to the question of how to remove a door handle of this modification is short - unscrew the fastening elements. As a rule, this is done only to replace it with a more modern model. Such fittings are cheap, and therefore no one will repair them, since disassembly is not provided for by definition.
Push design
The design of this type of door handle is somewhat more complicated. It is a lever-type product: its working part (via the axis) is rigidly connected to the locking mechanism. Additionally, some models are equipped with a latch that locks the locking device.

You can remove the door handle of this type of interior door using a screwdriver. But always with a narrow tip. A “clock” class tool is well suited for these purposes. The fixing screw is located in a small recess: accordingly, its slot is small, and a regular screwdriver may simply not fit. Once the fasteners are sufficiently loosened, the handle can be easily removed from the axle.
The base of some models of fittings is covered with a decorative strip. Without removing it, you will not be able to dismantle the door handle. As a rule, it is attached to a thread. Therefore, it is not difficult to unscrew the lining if it is not “stuck”. Rarely, but it happens. In the opened opening, fastening elements are clearly visible. There are two options - slotted or hexagon screws. Therefore, you will need a corresponding key (usually 2).
It’s easy to understand how to change a push-type handle, and when installing, all steps are performed strictly in the reverse order. If, in addition, it is necessary to dismantle the lock, then the protective plate on the end of the sash must additionally be removed.
Rotary model
Fittings of this type have many differences from push-type analogues. The difference is not only in shape, but also in some design features of the products. Although the general principle of operation of all mechanisms is the same.
Model with socket
Such round handles, depending on the design, are disassembled in different ways. The difference is in the method of attaching the decorative part.
Option 1 – there is no hole for access to fasteners. In simpler designs it is located on the side and is clearly visible. How to disassemble the round door handle in this case? It consists of two halves. You need to grab the lower (stationary) part and turn the upper part. With a little effort it will unscrew freely. After this, all that remains is to unscrew the fastening screw that “sits” on the axis and remove the second half.

Option 2 – there are holes. This is quite simple and no explanation is required.
Knob models
These are handles with a built-in latch. Removing them is somewhat more difficult, since it is necessary to fix the spring mechanism. This is done using the key that was originally included with the product. If you don’t have it (lost, broken), a thin nail, a lady’s hairpin or something similar will do just fine.

Procedure:
- The upper part of the fittings rotates.
- The selected device is inserted into the technological hole located on the side, and the spring-loaded pin is moved. It is he who holds the fittings in place.
- All that remains is to pull slightly towards you and remove the handle from the interior door.

Installing this type of fittings is also not difficult. After placing it in the cavity of the lock sash, it is fixed with a escutcheon, the axle is inserted, the fasteners are screwed in and the decorative parts are assembled.
Any man can solve the problem of how to remove the handle of an interior door. This does not require practical experience or any special equipment. And even more so, consultation with a professional. Everything is quite simple, and ordinary household tools are quite enough. Whatever happens - the appearance of abrasions on the metal, a breakdown of the mechanism, the desire to install new fittings on the door - all the work is done in a short time and on our own.
A handle is a necessary element of door hardware, designed for convenient opening of doors. The practicality of a door design largely depends on the external aesthetic appearance, design features and functionality of this accessory. With constant use of the door, the handle, regardless of the material and type, often becomes unusable: it wears out and breaks. Therefore, in case of any problems, it must be repaired or replaced with another one. In order not to call a specialist, you can perform this procedure yourself.
Brief instructions on how to disassemble a door handle will familiarize the reader with this simple process.
According to the installation method, there are 2 types of handles:
- invoices;
- mortise
Overlay fittings are installed on the door leaf using a strip; for a mortise design, there must be a hole in the door.
By purpose there are:
- input;
- interior.
Based on functionality, door products are divided into 2 types:
- movable;
- stationary.
Movable handles are available in 2 versions:
- rotary (knobs and buttons);
- push.

The analysis of a door handle depends on its type and design features.
Design features
Stationary handles are produced without latches or locks. The fastening elements to the door block are screws or self-tapping screws. Such fixed structures are decorative in nature and serve solely for the movement of the door. They can be 1-sided or 2-sided of different shapes, connected by an axial element. They are installed on interior or plastic balcony door blocks, rarely on entrance ones.
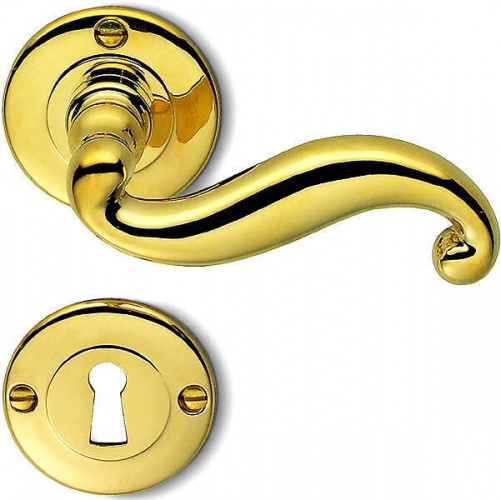
Pressure products are 2 L-shaped levers, which are connected by a rod passing through the door block. In such a device, when turning, the halyard tongue enters the inside of the door and locks it. Using the elements, external and interior doors are mounted.

The main advantage of the model is its reliability. The failure rate of push mechanisms is much lower than others.
The rotary mechanism is most often made in the form of a ball or button with a diameter of 50-60 mm with a lock located in the center of the round handle. The keyhole can have a 2-way exit or 1-way with a latch. The door opens with a simple twist. Such fittings may also contain a door opening blocker. Therefore, they are often used in door structures of bathrooms and interior units, and are also called knob handles.
They are compact, easy to install, and low in price, but have disadvantages such as low strength and fragility due to jamming of spare parts inside the mechanism.
Rotary and push products differ in the shape and method of opening the latch.
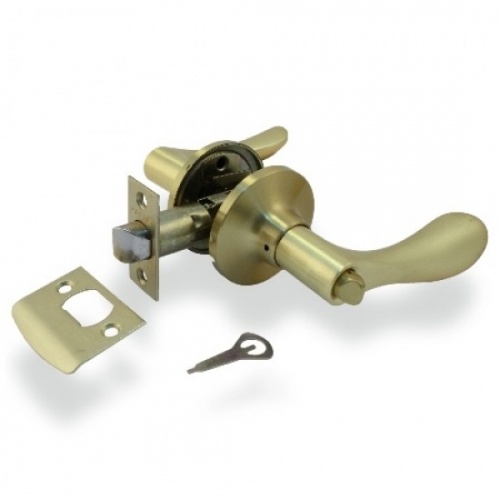
Components of the mechanism

Pivot and push door products for interior doors have the following spare parts and components:
- latch;
- strip or socket;
- decorative flange;
- fasteners;
- special key for squeezing and removing the mechanism.
The door hardware kit with keyhole is supplied with keys.
Required Tools
In order to remove the interior door handle, you need to prepare the following tools:
- drill;
- feather drill;
- cutter;
- flat screwdriver or screwdriver;
- roulette;
- marker;
- chisel;
- hammer.

How to remove
Dismantling door hardware is not a problem if you have the necessary tools and minimal theoretical knowledge of the mechanism. You can remove the door handle of an interior door yourself without calling a technician. To do this, you must follow the instructions:
- Support and secure the door.
- Pry the decorative flange with a knife and pull it out a little. Underneath there are fasteners that need to be unscrewed.
- There is a spring-loaded locking pin on the decorative flange of the pressure device. Press it in with a screwdriver. In rotary models, the pin is located inside the body. In order to get to it, insert a key or awl through the technological flange hole. If the pin cannot be felt, rotate the flange until it contacts it.
- Press the pin while pulling the door device.
- Unscrew the mounting screws.
- Separate the inside of the door element from the outside, remove the handle and decorative flange.
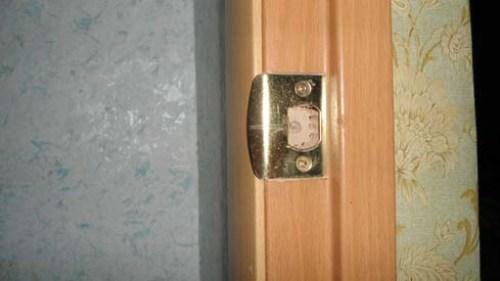
- If you need to remove the latch and replace it or repair it, unscrew the screws securing it to the side of the door block, remove the bar, then the mechanism.
When installing accessories to another location, you should not disassemble them for spare parts. It is attached to the door structure in the reverse order. If the handle or latch needs to be repaired or replaced, further disassembly is performed.
How to disassemble a door handle
Replacing a door handle is carried out for the purpose of repairing it due to breakage, wear, in the presence of abrasions, scratches, to improve the appearance, as well as when completely replacing the door block.

Before starting work, the type of mechanism and its features are established, because Some models with a simple device are easy to disassemble, while some have more complex elements, such as latches with locks. Carrying out such work is difficult. Therefore, it is necessary to consider replacing each type of door hardware separately.
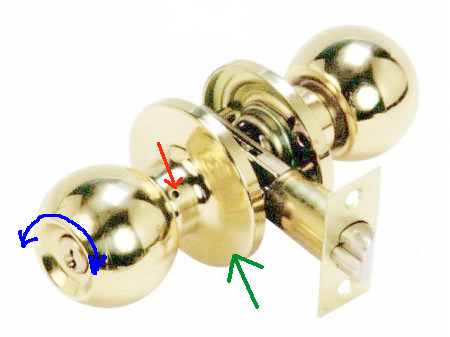
Round
To disassemble a round door handle or knob handle, you must follow these recommendations:
- Using a tool at hand, hook up a decorative flange or trim with a simple keyless rotary lock.
- Use an awl, nail or special key to press the opened stopper.
- At the same time, carefully pull out the handle and remove it.
- From the side of the removed part, unscrew the bolts from the mounting plate and disconnect it from the door leaf.
- Unfasten the cylindrical mechanism, the latch.
- Remove the screws and detach the tab.

If there is no need to change, it is rearranged. It happens like this:
- Insert the latch so that the beveled part of the tongue faces the direction the door closes.
- Fasten with 2 screws.
- Insert the piece of hardware with the key drum on the other side of the door structure.
- Attach the clamping part and secure with 2 screws.
- The handle should turn without jamming and return freely to its normal state.
- Correct it. To do this, you need to carefully hold one side and align the other.
- Attach the decorative trim.
- Insert the rest of the handle.
The accuracy of installation and operation is checked both from the latch itself and from the drum device with the key.
Stationary
The stationary product has a simple design and is attached to the door with screws. Therefore, it rarely breaks, and is removed only when it is necessary to exchange it for a more functional model.
To unscrew the fittings for an interior door, you need to do the following:
- Inspect the door mechanism for the presence of an axle rod. To do this, hold the handle with one hand and turn it with the other.
- If the mechanism is located on a rod, remove one supporting side, the second comes off on its own.
- If the rod is not found in the handle, use a flathead screwdriver to remove the screws holding the handle in place.
- Remove it by gently pulling it towards you.
When unscrewing the mechanism, you must carefully hold it with your hand so that after removing the connecting screws, part of the product does not fall out of the connector and is damaged.
For interior doors
In the pressing device, the process of disassembling it causes difficulties. This is due to the fact that the fittings are attached to the axial rod and tightened with a 4-sided joint.

To repair the handle of an interior door, disassembling the push mechanism is carried out in 3 stages:
- Remove the screws that hold the cover in place and remove the plugs.
- Then you need to loosen the fixation of the rod and separate the 4-sided square.
- Remove the cover plate on the other side, the remaining part of the mechanism and the axial rod. After removing the parts, you need to pull the handle towards you.
The pressure product is ready for replacement or repair.
How to fix a pen
Door handle repairs are often carried out in the following cases:
- the mechanism does not return to its original position;
- the handle jams and is difficult to turn;
- The tongue does not move when turning or pressing the device;
- the handle falls out without damaging the base.
Often the cause of these problems is wear and tear of the part during constant use. Therefore, it is periodically necessary to lubricate the mechanism parts and the keyhole, and clean them from dust and dirt. When lubricating, the door product is rotated so that the viscous liquid is evenly distributed among the elements.
If the handle is loose, it is necessary to correct and tighten the fasteners.
Sometimes it is necessary to repair the fittings in a metal Chinese door. Products made in China from silumin malfunction and break, and installing a lock on such a door is not easy. It's easier to replace the mechanism. The principle of operation is similar to replacing an element in interior doors.
In the interior
In door handles for interior doors, repairs are most often made when the handle falls off. The base remains attached.
The reason is the use of low-quality fittings, as a result of which the locking ring could break or fall off.

To carry out repair work, perform the following steps:
- Unfasten the base from the door.
- Inspect the retaining ring. If it has moved, you need to adjust its position and install it. If the ring bursts or breaks, it is replaced with further installation of the handle.
The duration of the procedure is 15-20 minutes.
Repair of the door handle of an interior door is carried out if, after opening the doors, the fittings do not return to their normal position.

The cause of the malfunction is a broken or displaced spiral.
To replace the spiral, carry out the following work:
- remove the device;
- unfasten the damaged part and replace it;
- secure with a locking ring at the top;
- install the mechanism.
If the spring breaks, you can make it yourself from a small piece of steel wire. Pre-wind it, heat it over the fire until it turns bright red and put it in cold water.
Lock removal and repair

Repairing interior door locks is difficult. The causes of malfunctions are different.
When using cheap, low-quality silumin door fittings, the 4-sided pin may break. The solution to the problem is to purchase a steel mechanism from trusted manufacturers and completely replace it.
A common problem with locks is the tongue not working properly. This is possible with a short pin. The square can move in the direction of the latch, pressing it, reducing operation.
Repair work on locks is carried out as follows:
- A long pin is purchased and the length is measured.
- Using a grinder, it is shortened to the required size.
- Then you need to disassemble the interior door lock.
- The square is changed, door fittings are installed.
When installing the handle, the base must cover all the holes that remain from the previous mechanism.
A lock with a handle can be replaced or repaired even by a novice master who knows how to use available tools.
You can carefully remove and disassemble the door handle yourself without damaging the door leaf. Many people have experienced a faulty interior door handle. If it stops working, or problems arise that interfere with the comfortable and unhindered opening of the door, it is worth disassembling it and checking the reason. In the future, determine the cause of the breakdown and eliminate it. If the handle cannot be repaired, it should be replaced with a new one. In this case, you need to know how to disassemble the structure, assemble it or replace it, so as not to call a specialist for help.
Deciding on the look: how to disassemble a door handle
Handles are often exposed to people who live in an apartment or house. Therefore, pen breakage is no exception and can happen at any time. In order to find out why the handle broke, it is worth disassembling it and making sure what the reason is. Then repair it or replace it with a new one.
In order to disassemble an aluminum door handle, you need to know what type it is, since the mechanism depends on the model. After this, carefully remove it from the door.
Before you start disassembling the door handle, you need to decide on its type
The following types of handles exist:
- Push;
- Stationary;
- Rotary.
The push handle has the shape of the letter “G”. Its mechanism includes a tongue, with the help of which the opening process occurs.
The stationary handle is attached to the door leaf using screws/screws. It may have an axial element and be located on both sides of the door.
The rotary handle has the same mechanism as the push handle. When opening it you need to turn it. The model may have a round shape and look like a ball. To disassemble the handle, you need to remove it. To do this, you need to carefully separate it from the door leaf using a screwdriver.
Reasons for disassembly: how to remove the door handle of an interior door
Almost all pens have a similar disassembly process. If you know how to properly disassemble the handle, you can do it in half an hour. To do this, you need to understand how it works in order to unscrew it.
Reasons for disassembling a door handle:
- Failure – breakdown;
- Repair work;
- Replacing the old model;
- Loss of original aesthetic properties (scratches, abrasions).
If a cheap handle is installed, you should expect that it may break soon after installation. Door handles made in China have a short service life and are inexpensive. That's why many owners install such handles. But in order not to make repairs or replacements every time, it is worth choosing higher quality fittings for the interior door.
As a rule, door handles on interior doors are replaced if they break or lose their original properties.
During the renovation of an apartment, its interior can change dramatically. The old handle may not fit the updated version of the room/apartment. Therefore, you have to disassemble the previously installed handle and replace it with a new one.
New pen models are appearing on the market. They may have advantages over older models: updated and simplified mechanism, shape, color. Some people exchange old handles for new ones because they saw a product on sale that was better or of higher quality than what they had previously installed. This is also the reason for disassembling the handle.
If the handle has lost its original properties - appearance, then this is another reason to install new fittings. All door handles are subject to frequent exposure. Over time, scratches appear on them, and the decorative coating wears off. All these flaws spoil the appearance of the metal handle.
Repainting a handle is unprofitable, time consuming and not always possible. It's easier to replace it with a new one.
Step-by-step instructions: how to disassemble the round handle of an interior door
There is a certain scheme according to which round pens (knob pen or loku) are disassembled. To repair or replace it, you should carefully and carefully disassemble the handle structure. Disassembly will not take much time if you follow the instructions.
You can disassemble the round handle yourself if you carefully read the training instructions
Instructions for disassembling the round pen:
- Prepare the necessary tools for work (screwdriver, wrench with stop);
- Remove the trim around the handle;
- Press the open stop with a special key;
- Turn one handle (keep the other one stationary);
- Pull the handle on one side and remove;
- Unscrew the screws;
- Remove the handle on the other side;
- Unscrew the screws (they hold the latch);
Disassembly is done quickly using these instructions. The main thing is to carefully carry out all actions so as not to completely break the mechanism, because sometimes you can replace only one element and it will work.
How to replace a door handle with a lock: disassemble the push model
The push handle model is popular. It is installed not only on interior doors, but it is also suitable for entrance doors if it has a lock in its structure. In order to remove this handle, with a built-in latch or lock, you will need a little time and a screwdriver.
Before you start replacing a door handle with a lock, it is better to prepare the necessary tools in advance
Steps to remove the lever handle from the door:
- Unscrew the handle (its pressure part);
- Remove the trim;
- Unscrew the screws (which are hidden under the cover);
- Remove the first part of the handle (hold the other in a stationary position);
- Remove the second part of the handle together with the axial part.
If you need to disassemble the lock itself, then you need to unscrew the plate (from the end of the door). Then remove the mechanism itself.
In the case where the handle moves away from the door, it is not necessary to remove it completely. It is enough to tighten the bolts with which it is attached to the door.
To install the handle, you must first install the mechanism itself, then the handle and screw on the cover.
Sometimes the reason a pen doesn't work well is because it needs to be disassembled, cleaned of dust or lubricated. Or turn over the fittings if they have taken the wrong position over time.
How to disassemble a lock on an interior door (video)
The door handle is an integral part of the door design. Therefore it should work properly. It is not necessary to call a technician to replace or repair the door handle. It is enough to know a little about the mechanism of the handle that needs to be removed and take into account the instructions for disassembling it. In order for the door handle to work smoothly: it does not make sounds, it turns or presses well, the latch does not jam, you need to periodically lubricate its component parts of the mechanism and clean them from accumulated dust.
Interior doors are sold without fittings; the delivery set includes only the door leaf and posts from which the door frame will be assembled. There are no factory-made holes in the canvas for installing locks and handles. This is due to the fact that handles, while standardized, come in different designs and sizes. In addition, the choice of accessories depends entirely on the preferences of the buyer. Therefore, a person who has started a renovation and replacement of interior doors is faced with the problem of choosing whether to invite a professional or install the handles himself. It should be noted that if you decide to install the doors yourself, you will definitely be able to handle the installation of door handles.
Types of handles for interior doors
Door handles for interior doors can be classified according to installation method, method of operation, shape, material, and the presence of a lock.
Based on the installation method, there are stationary (overhead) and mortise models. Overlays are attached to the door leaf, and for mortise ones you need to drill holes in it.
According to the method of work there are:
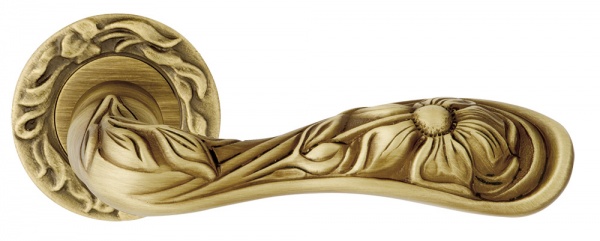
One of the most popular materials for the production of door handles is brass. In addition to its excellent aesthetic properties, brass is practical and durable.

As a rule, complex locking systems are not installed on interior doors. The exception is a plumbing lock installed in bathrooms and toilets.

Installing a handle on an interior door
Let's look at the installation features of the most popular model for interior doors - knob handles. Handles are usually installed on a hung door, but many experts recommend removing the door leaf for installation. True, this cannot always be done easily.


Advice. If the door leaf is not removed from the hinges and the installation is carried out with the door in a suspended position, move a chair or some object towards it so that the door remains motionless while you work.
Installation tool
You will need the most common tool, which is found in every home:

A marking diagram is included with the door latch, but it is easy to make marks for the holes without it. 1.0 meters are measured from the bottom edge of the canvas on both sides. You need to measure 6 cm from each edge of the door and make a mark. Using a square, draw a strictly horizontal line that will connect these two points. At the end of the canvas, a mark with a pencil and an awl is placed on this line in the center. The latch strip is applied and the veneer is cut with a sharp knife. We remember that the strip must be recessed into the door leaf so that it forms a single surface with the leaf.
Some experts advise starting drilling from the end of the blade with a feather drill. With this sequence of work, when drilling with a crown, the chips will fly into the hole already made, and not clog the teeth of the crown.

The feather drill should go to the depth of the shoulder blade, no more. The drill is pressed to a point at the end of the blade and a hole is drilled. Then, using a crown, holes are drilled alternately on each side of the canvas; there is no need to make them through. As soon as the tip of the crown appears on the opposite side, you must stop the drill and start drilling on the other side. This way the veneer will not be damaged when the crown comes out.

After the holes are ready, using a chisel and hammer, we make a selection along the line cut with a knife under the latch bar. Install the latch and tighten it with two self-tapping screws. It is better to take not the “standard” self-tapping screws that come with the latch (they are usually soft metal), but high-quality ones.

Using the key included in the kit, we disassemble the handle into two parts so that it can be installed. To do this, one mounting screw must be loosened and the other unscrewed. The central rod is inserted into the hole and the fastening screw is tightened tightly on one side. Then the second half of the knob handle is put on the rod, and the second screw is tightened. Self-tapping screws are screwed on both sides, which will cover the decorative trims and the screws will not be visible.

After installing the knob handle, all that remains is to install the “return” on the box. The door is closed, but not completely, and the upper and lower edges of the tongue are marked with a pencil. Using a square, the distance from the edge of the leaf to the center of the latch strip is determined, and this dimension is transferred to the door frame. Then a “return” strip is applied to the box, the veneer is cut with a knife, and a chisel is used to cut out the strip and tongue. The door is closed and the latch is checked.
Then the strip is installed on the box. Special “pockets” for recesses under the tongue are sold; they are made of plastic or metal. The screws that secure the return strip can be covered with self-adhesive plugs. After this, the installation is complete.
How to disassemble and reassemble an interior door handle?
An installed knob handle can be disassembled in two ways, depending on its design. Unfortunately, most of these models are of rather low quality and often fail.
Disassembling one structure begins with carefully prying and removing the decorative trim. The lining has a special groove, usually it faces down. The ball-shaped handle will interfere with unscrewing the screws, so you need to press out the locking pin and at the same time, with a little force, remove the handle from the central rod. Once the handle ball is removed, it will be very easy to unscrew the screws.

To disassemble the second structure, which does not have a locking pin, you need to press the spring-loaded pin through the technological hole with the key supplied and remove the handle ball. If the key is not long enough (this happens), use a simple nail. Then the decorative trim and screws are unscrewed. If you cannot find the spring pin through the access hole, it means that the knob handle was not assembled correctly. Rotate the decorative trim 180° and the problem will be solved.
The handle is assembled in the reverse order.
